Streamline Your Workflow: Integrate Microsoft Teams with WebStatus247
Webhooks in Microsoft Teams offer an easy and direct way to communicate real-time information to Microsoft Teams from third-party applications. By following these steps you will be able to obtain the Webhook URL for Microsoft Teams notifications. Let's get started!
1. Create a channel in the team :
Before you can create a webhook, you need to have a team and a channel where the messages will be sent. If you don't have one, create a new team and channel in Microsoft Teams.
Create a Team: Open Microsoft Teams and click on Join or create a team at the bottom of the teams list. Select Create a team and follow the prompts to set up your team.
Create a Channel: Inside your team, click on the ellipsis (three dots) next to the team name, select Add a channel, and provide the necessary details.
2. Add an Incoming Webhook Connector :
Open Microsoft Teams: Launch the Microsoft Teams application on your desktop or via the web.
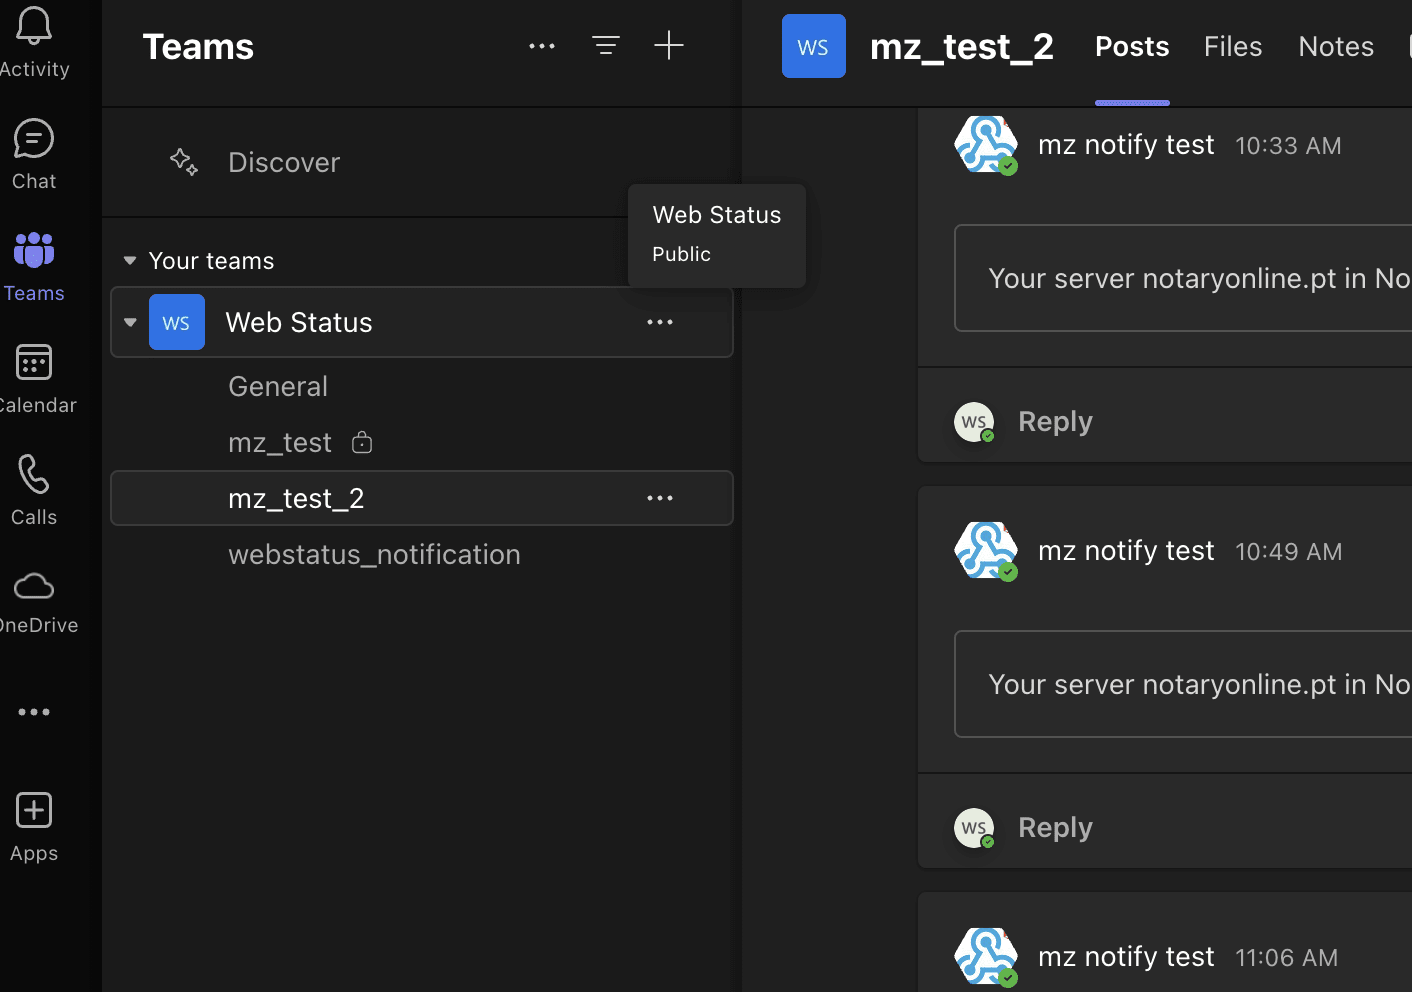
Select the Team and Channel: Navigate to the team and channel where you want to add the webhook.
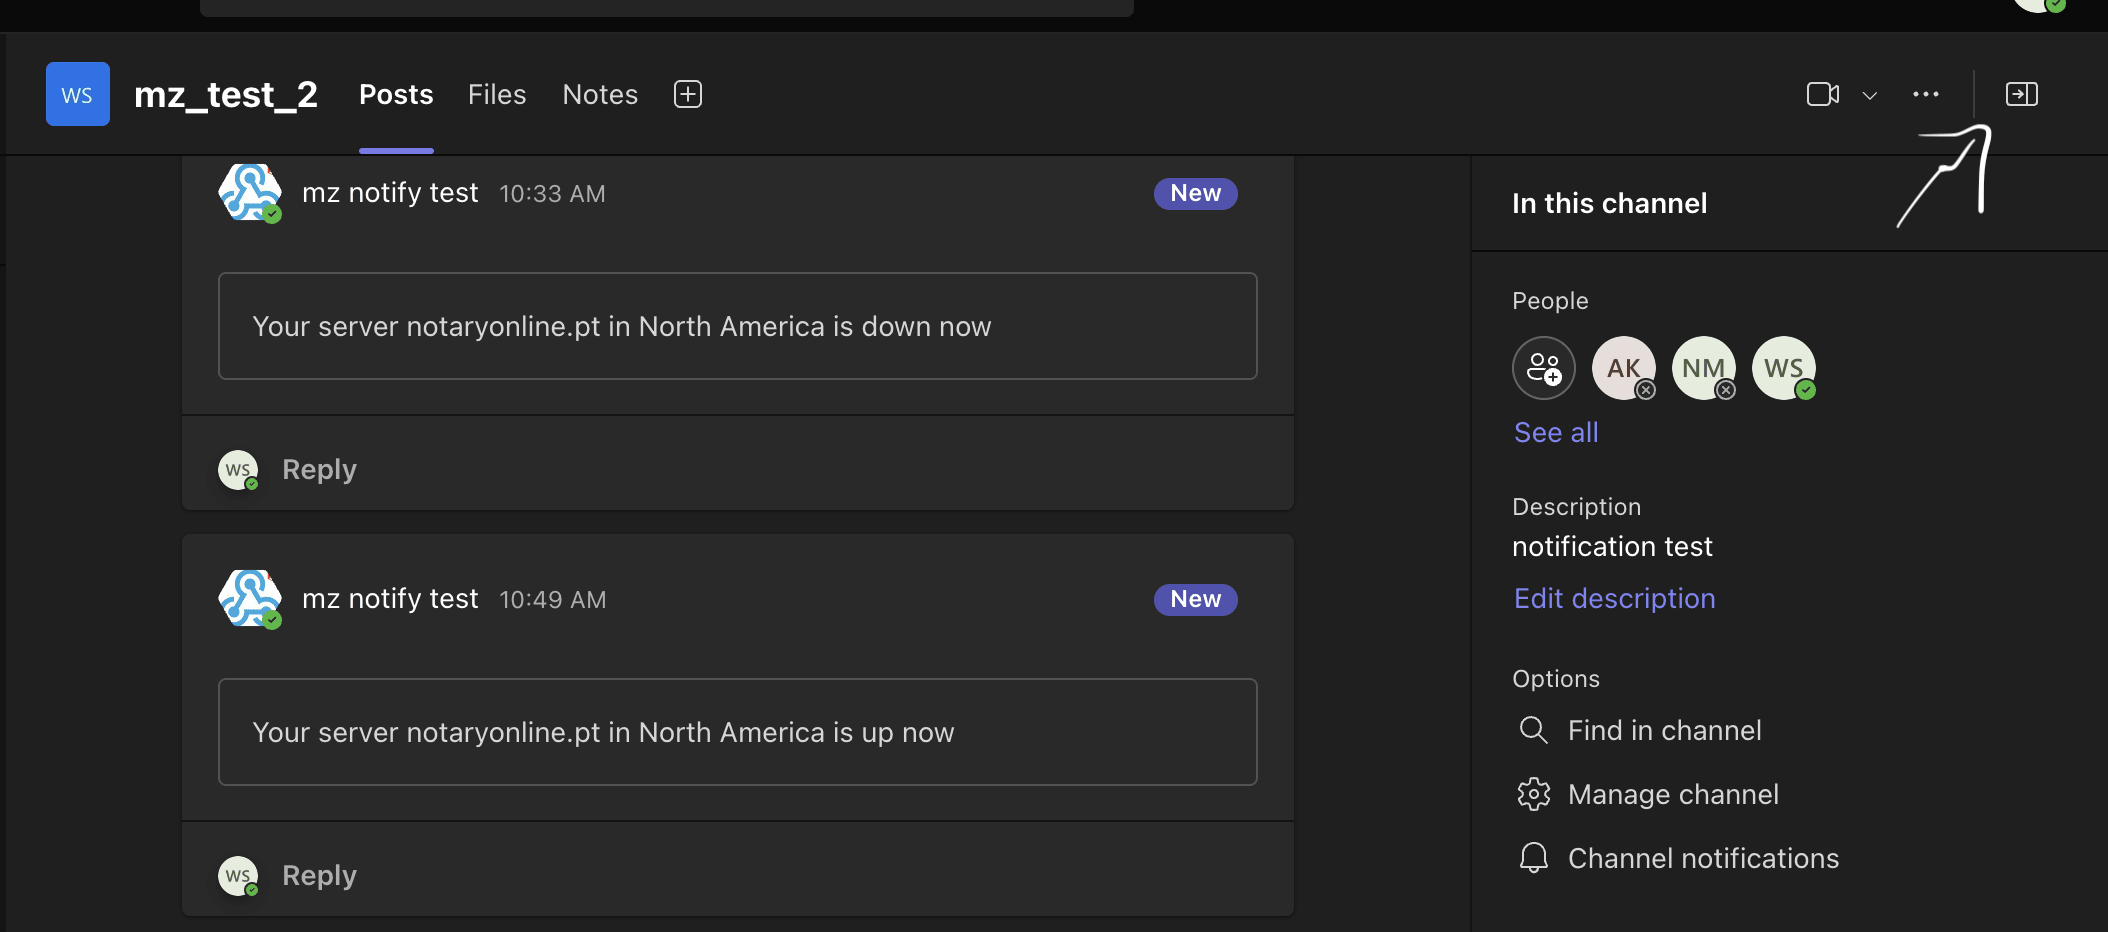
Access Channel Options: Click on the ellipsis (three dots) next to the channel name to open the channel options menu.
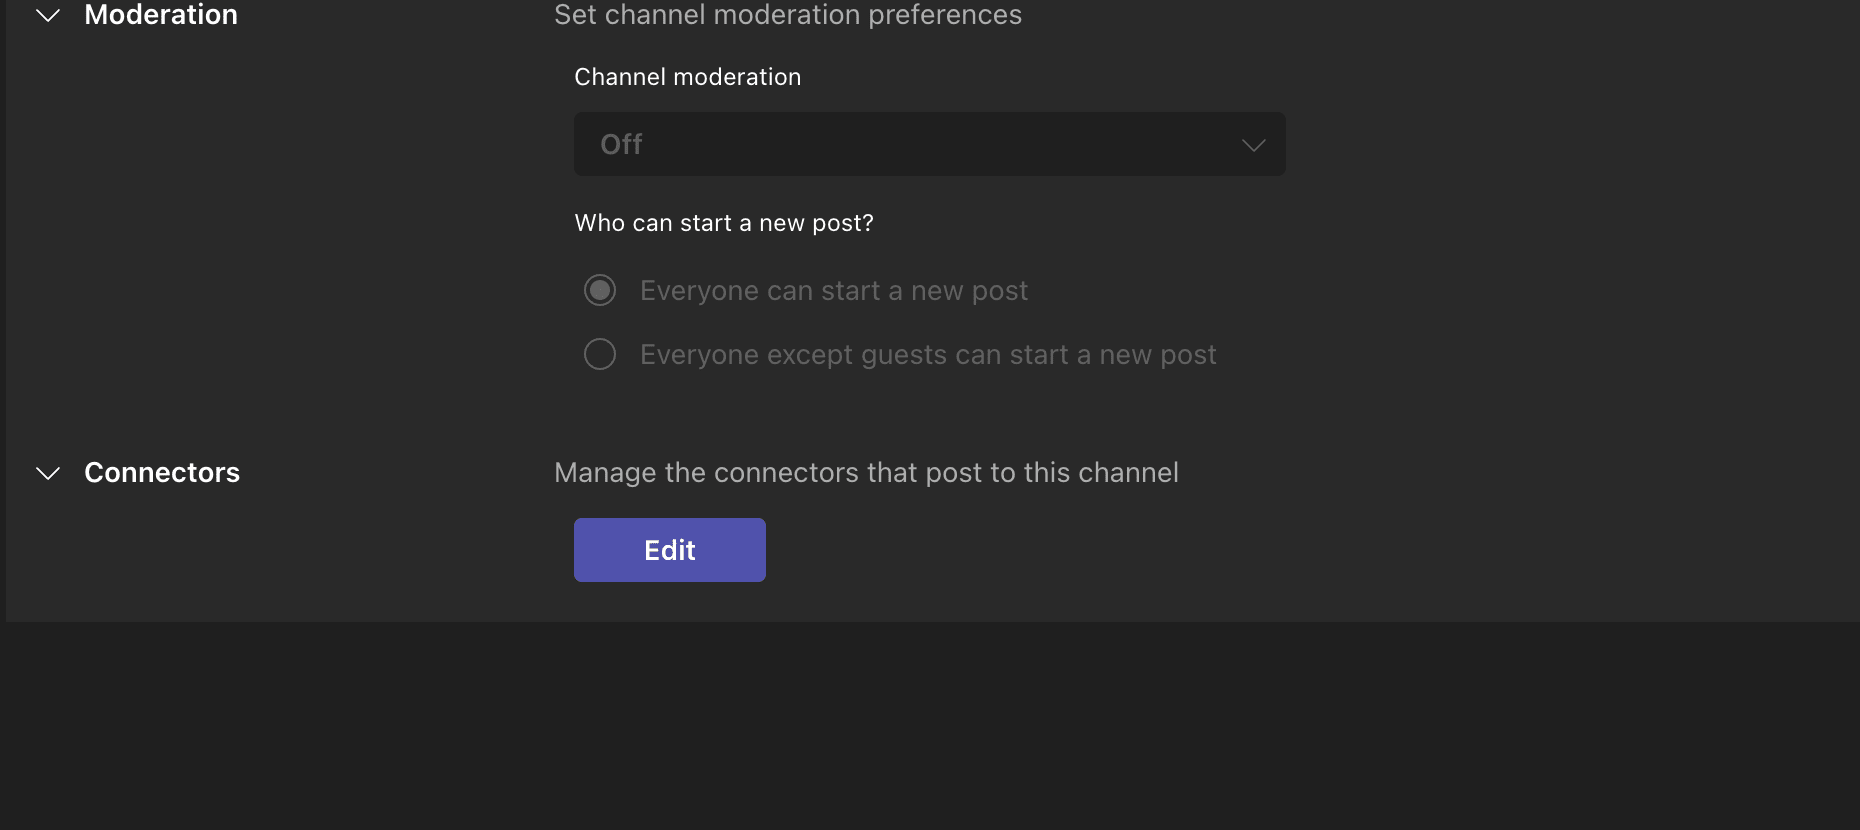
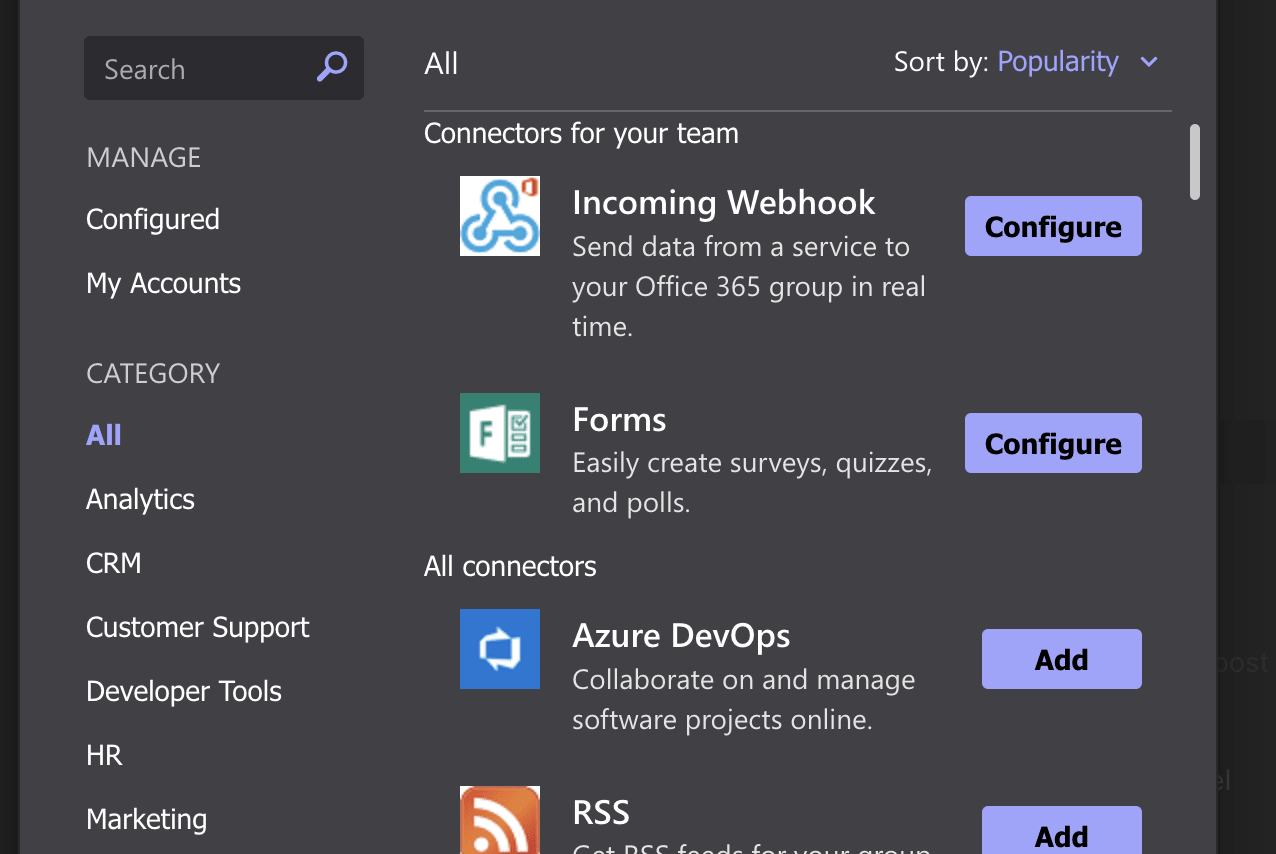
Choose Connectors: From the drop-down menu, select Connectors.
Find Incoming Webhook: In the Connectors window, use the search bar to find Incoming Webhook.
3. Configure the Webhook :
Name Your Webhook: Provide a name for the webhook. This name will be used to identify the webhook in the channel.
Create the Webhook: Click the Create button to generate the webhook URL.
Upload an Image (Optional): You can upload an image to be associated with the webhook. This image will appear next to messages sent by the webhook.
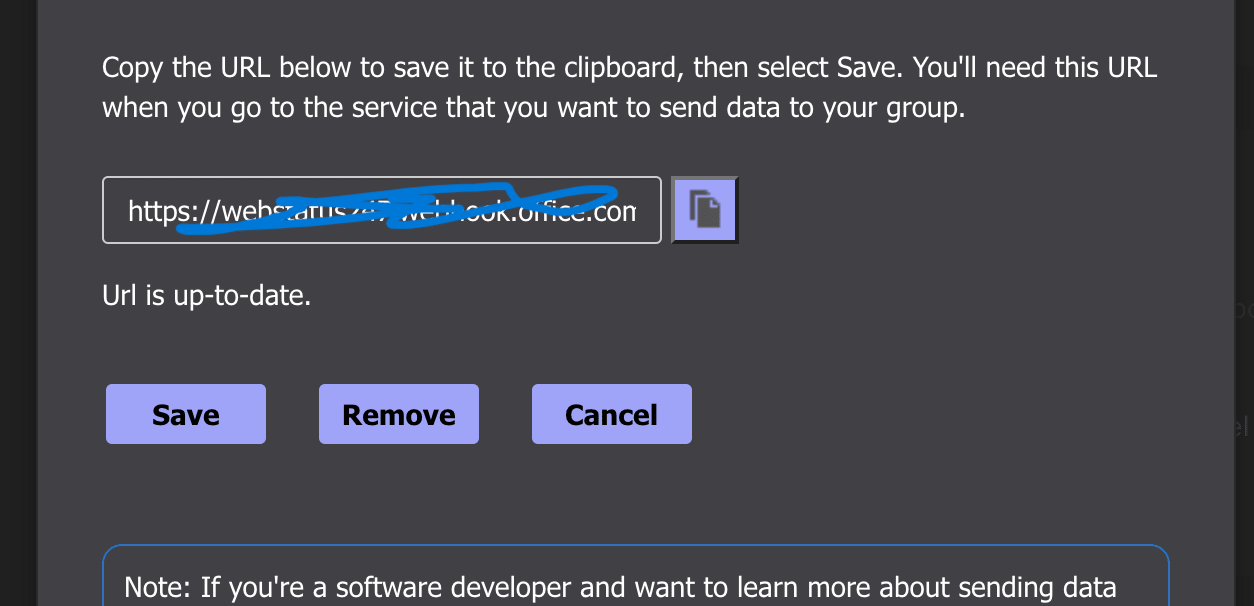
4. Copy the Webhook URL :
Copy the URL: After creating the webhook, a unique URL will be generated. This is the webhook URL that your application will use to send messages to the Teams channel.
Store the URL Safely: Keep this URL secure. Anyone with this URL can send messages to your Teams channel.