Adding a Webpage to Your Monitoring Dashboard
Follow our guide to set up comprehensive website, API, and SSL monitoring. Learn to configure downtime alerts, SSL expiry reminders, and advanced settings like HTTP methods.
1 Go to Your Dashboard
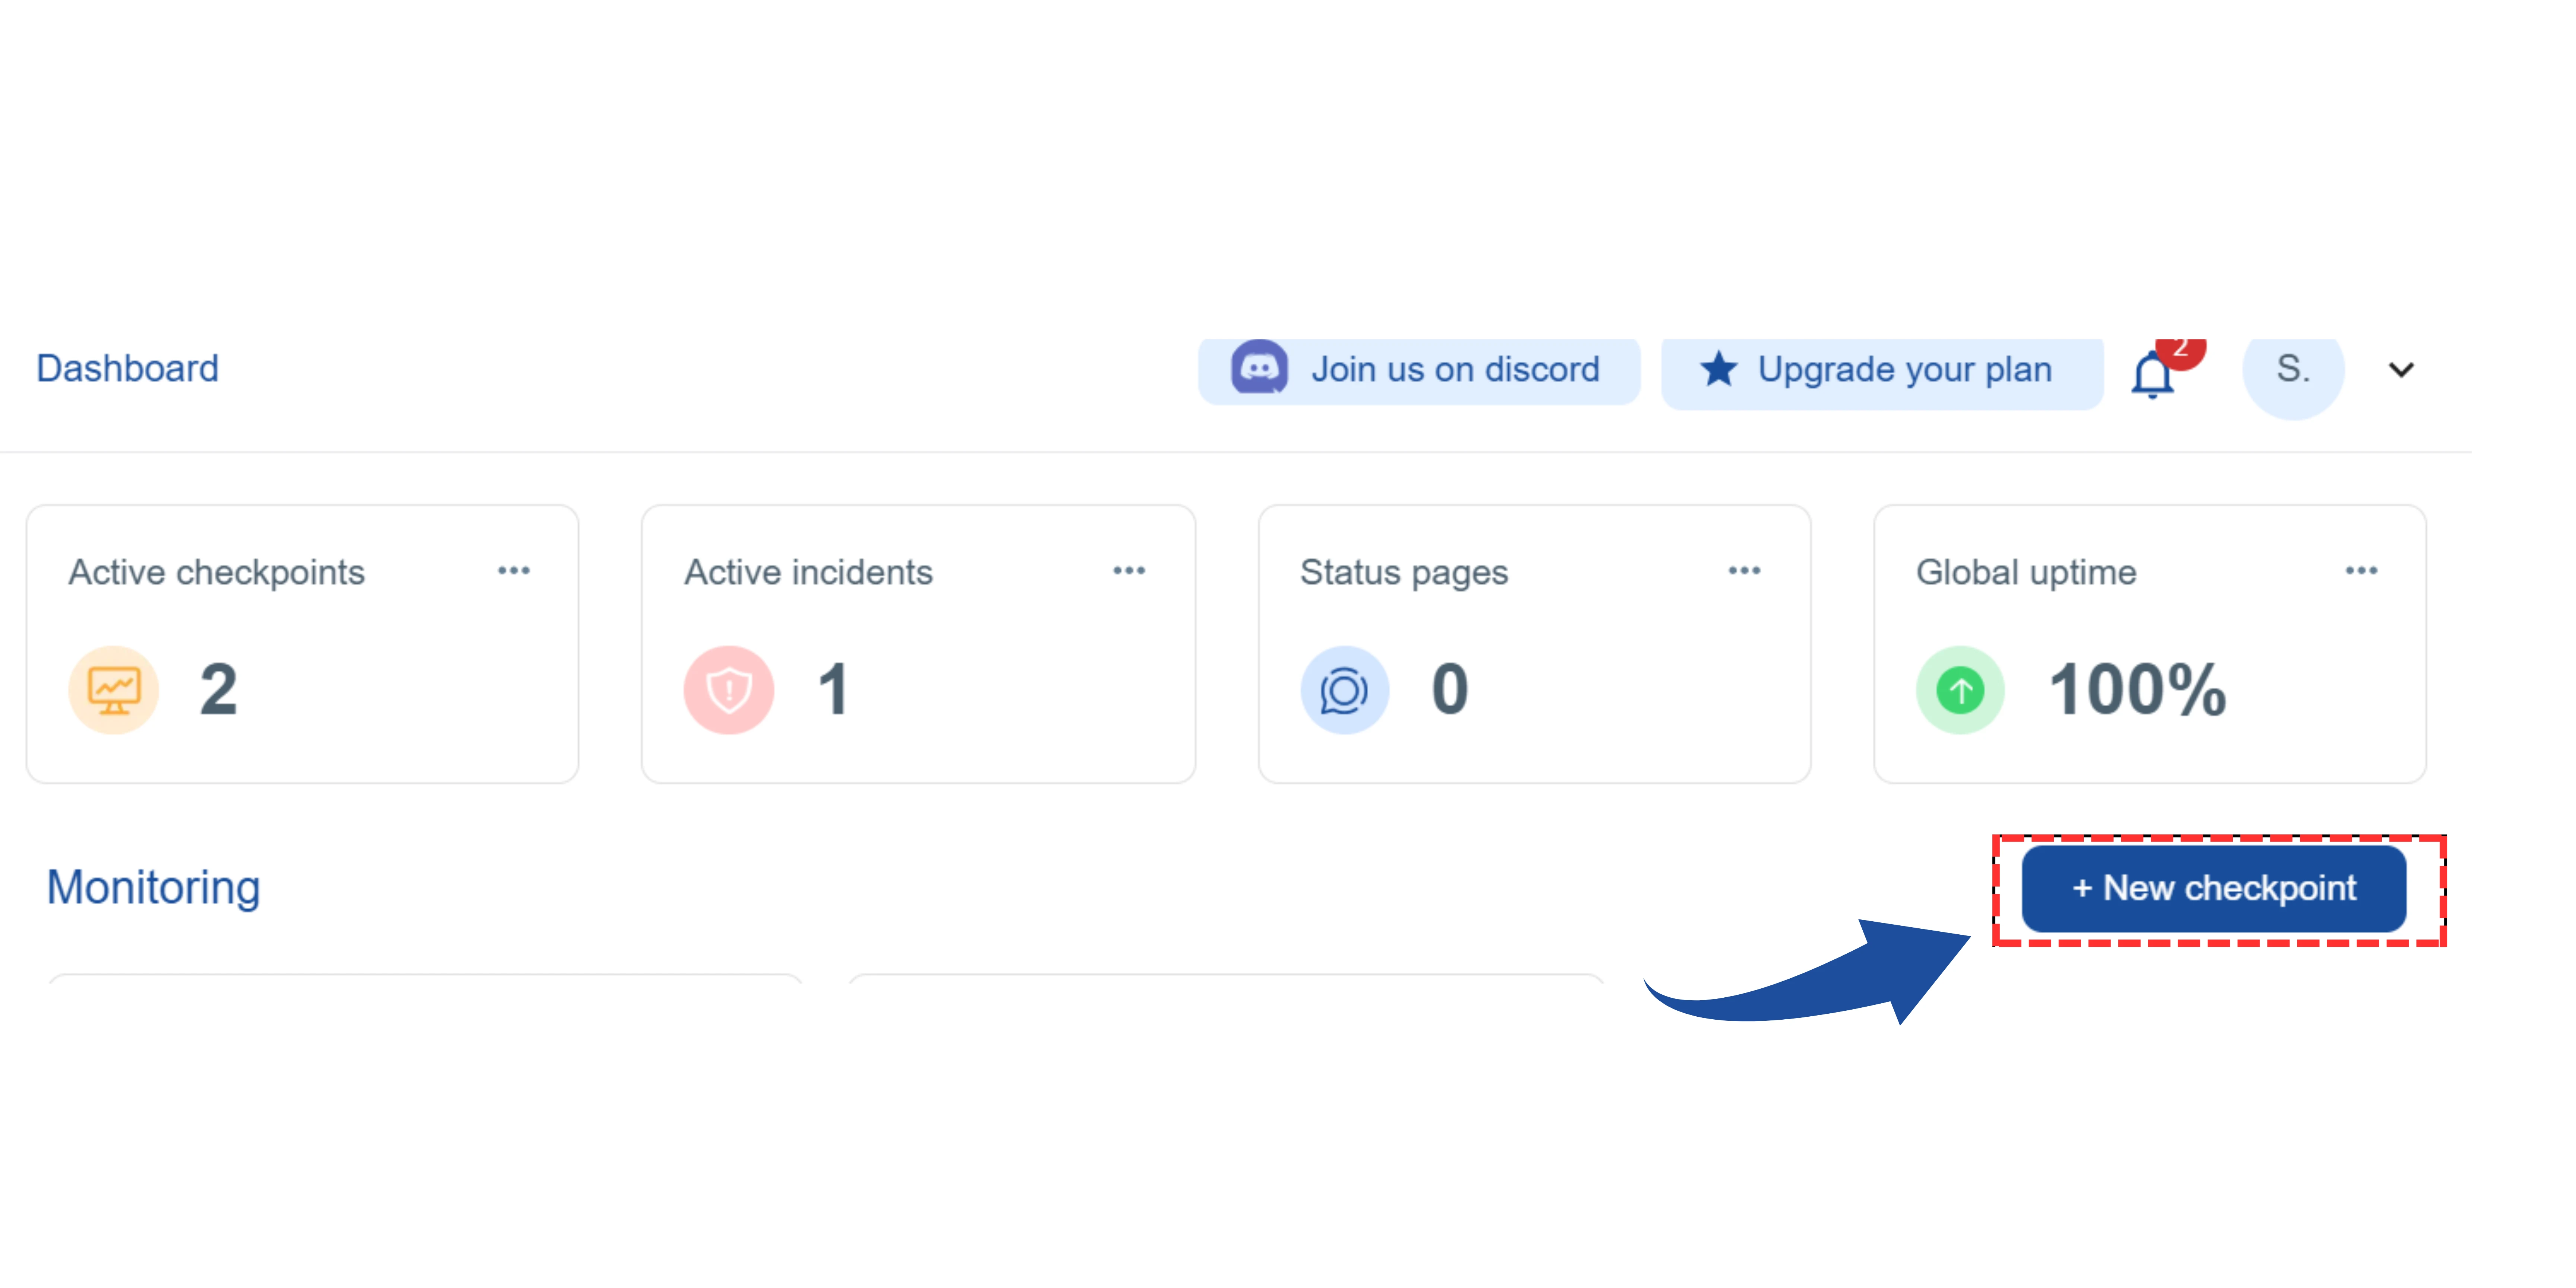
On your main dashboard, you will see the "New Checkpoint" button. Click on it.
2 Select the Checkpoint Type

You will now be on the "Add Checkpoint" page.
There, you will find the "Checkpoint Type" option.
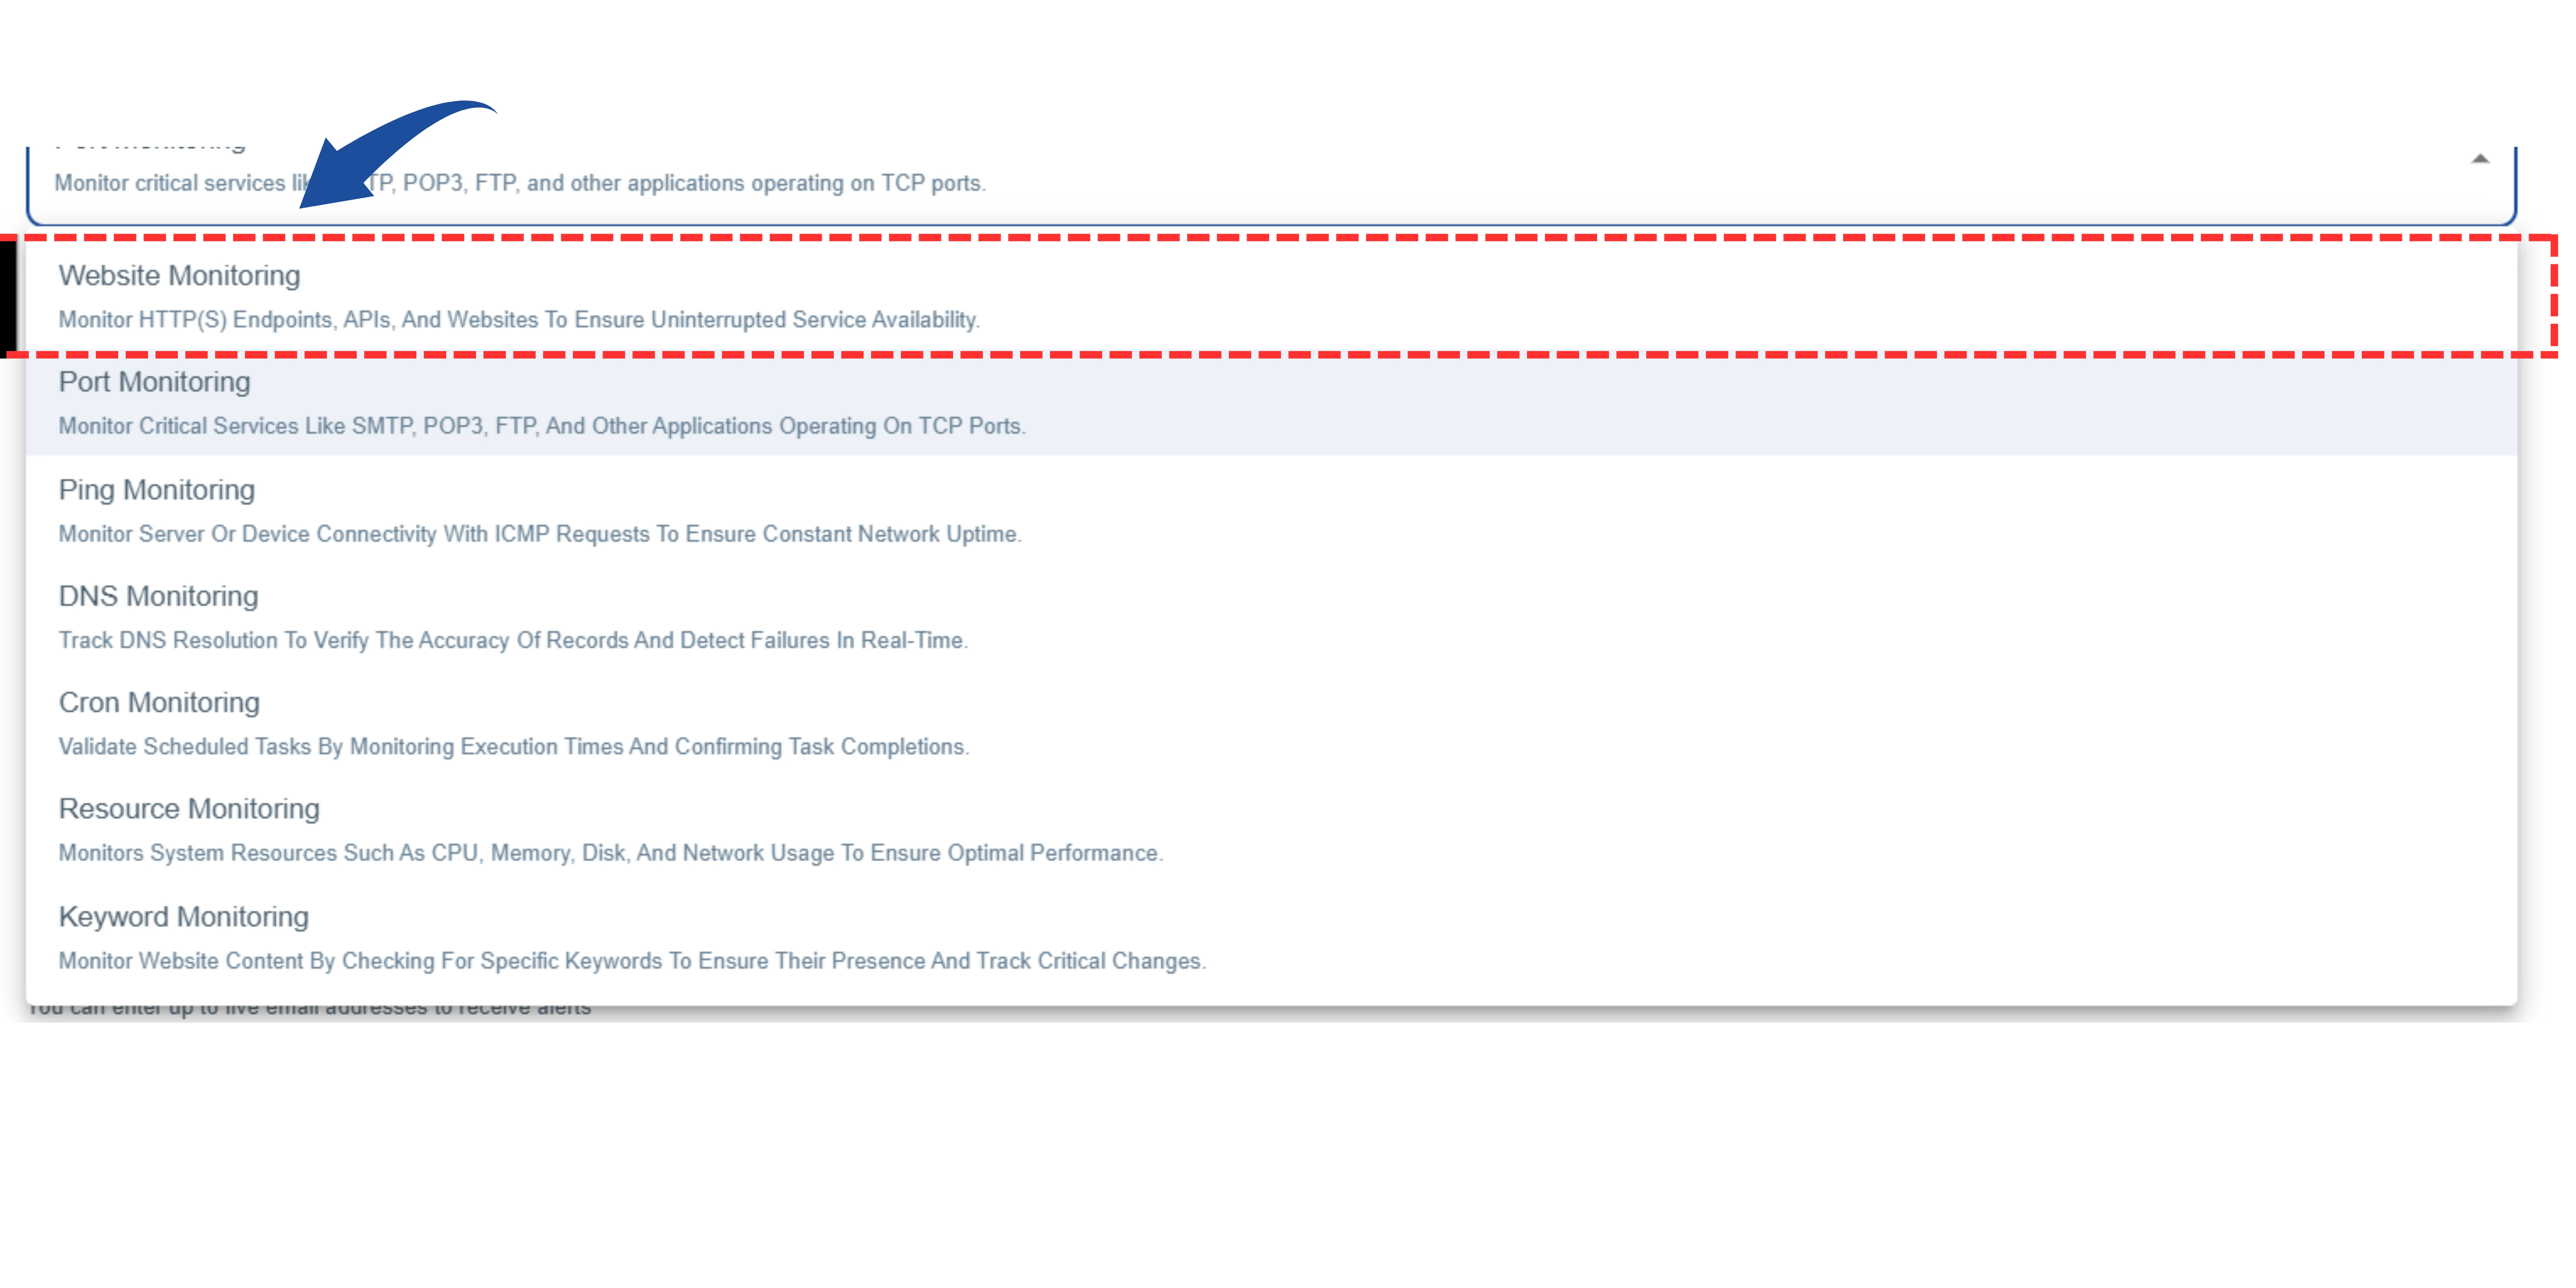
Under “Checkpoint Type”, select Website Monitoring.
Note: This tool also has other monitoring types like Ping, DNS, Keyword, etc., but for checking a website, you should choose "Website Monitoring".
3 Enter Website Details
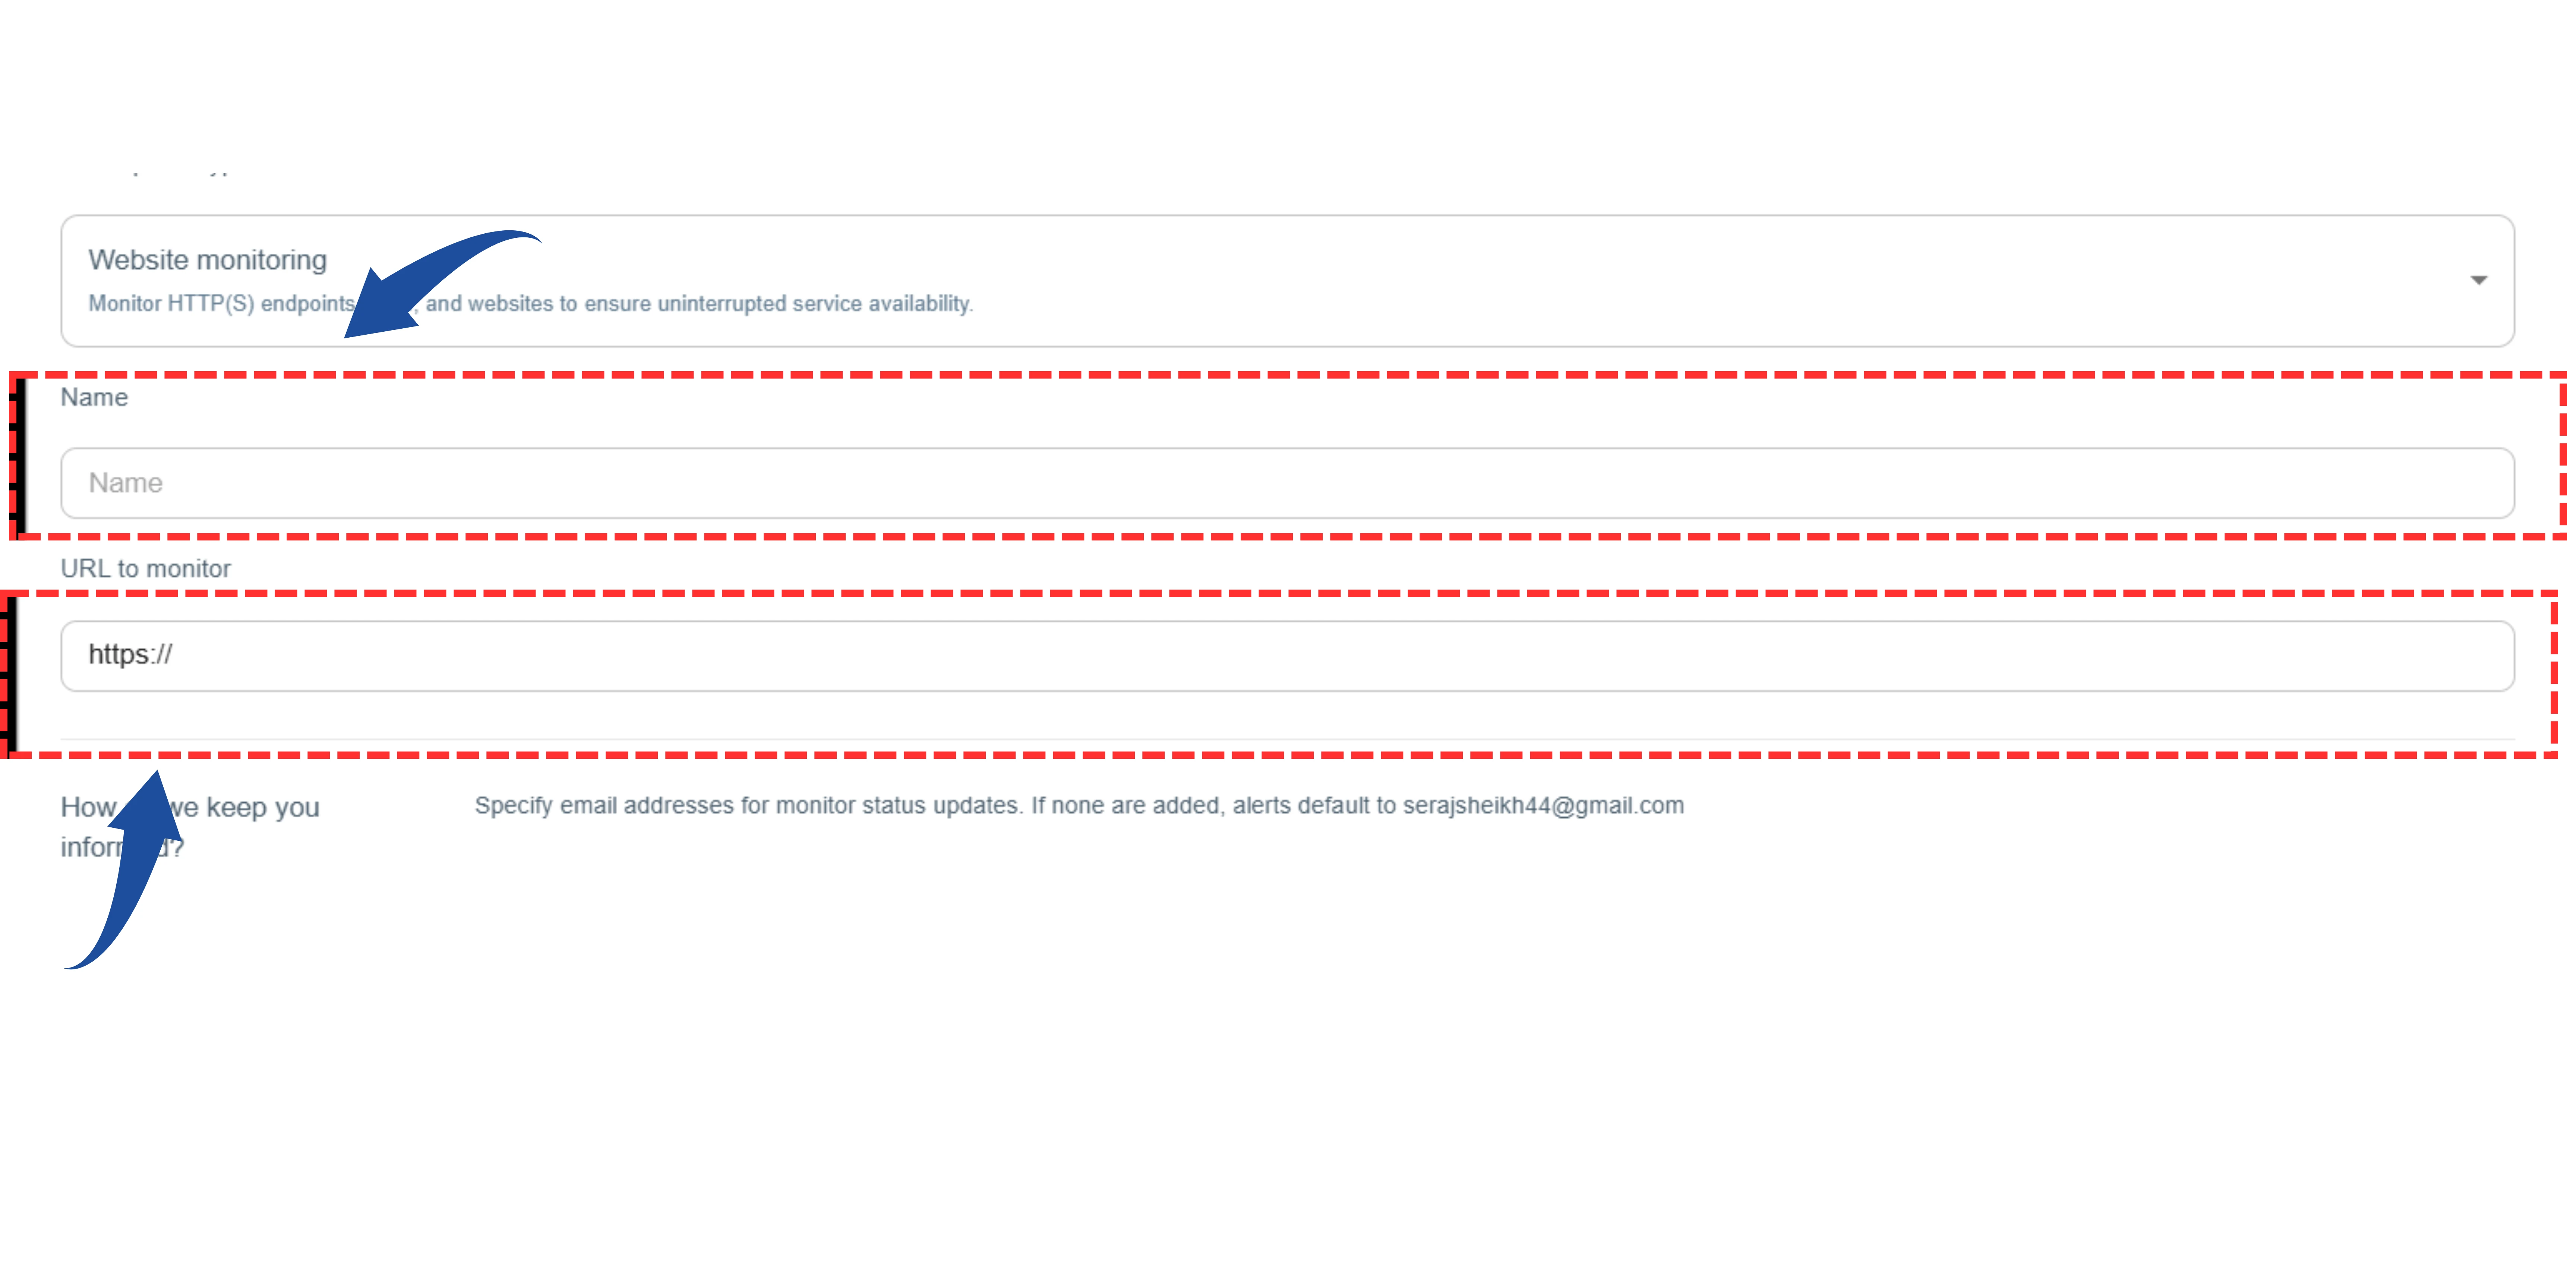
Name: Enter any name for your website, e.g., "My Business Homepage".
URL: Provide the full address of your website with https://, e.g., https://www.example.com
4 Configure Monitoring Settings

- Email Notifications: Enter email addresses for alerts. If none are added, alerts go to the default email (xyz@gmail.com).
- Monitor Interval: Choose frequency of checks (e.g., 30s, 5min, 1h).
- Alert Types: Choose how to receive alerts: SMS , Voice Call
- Location: Select at least one location from which monitoring should be done (e.g., Portugal, USA).
5 Configure Monitoring (Premium Settings)
These are advanced settings providing extra security and control:
Check SSL Errors
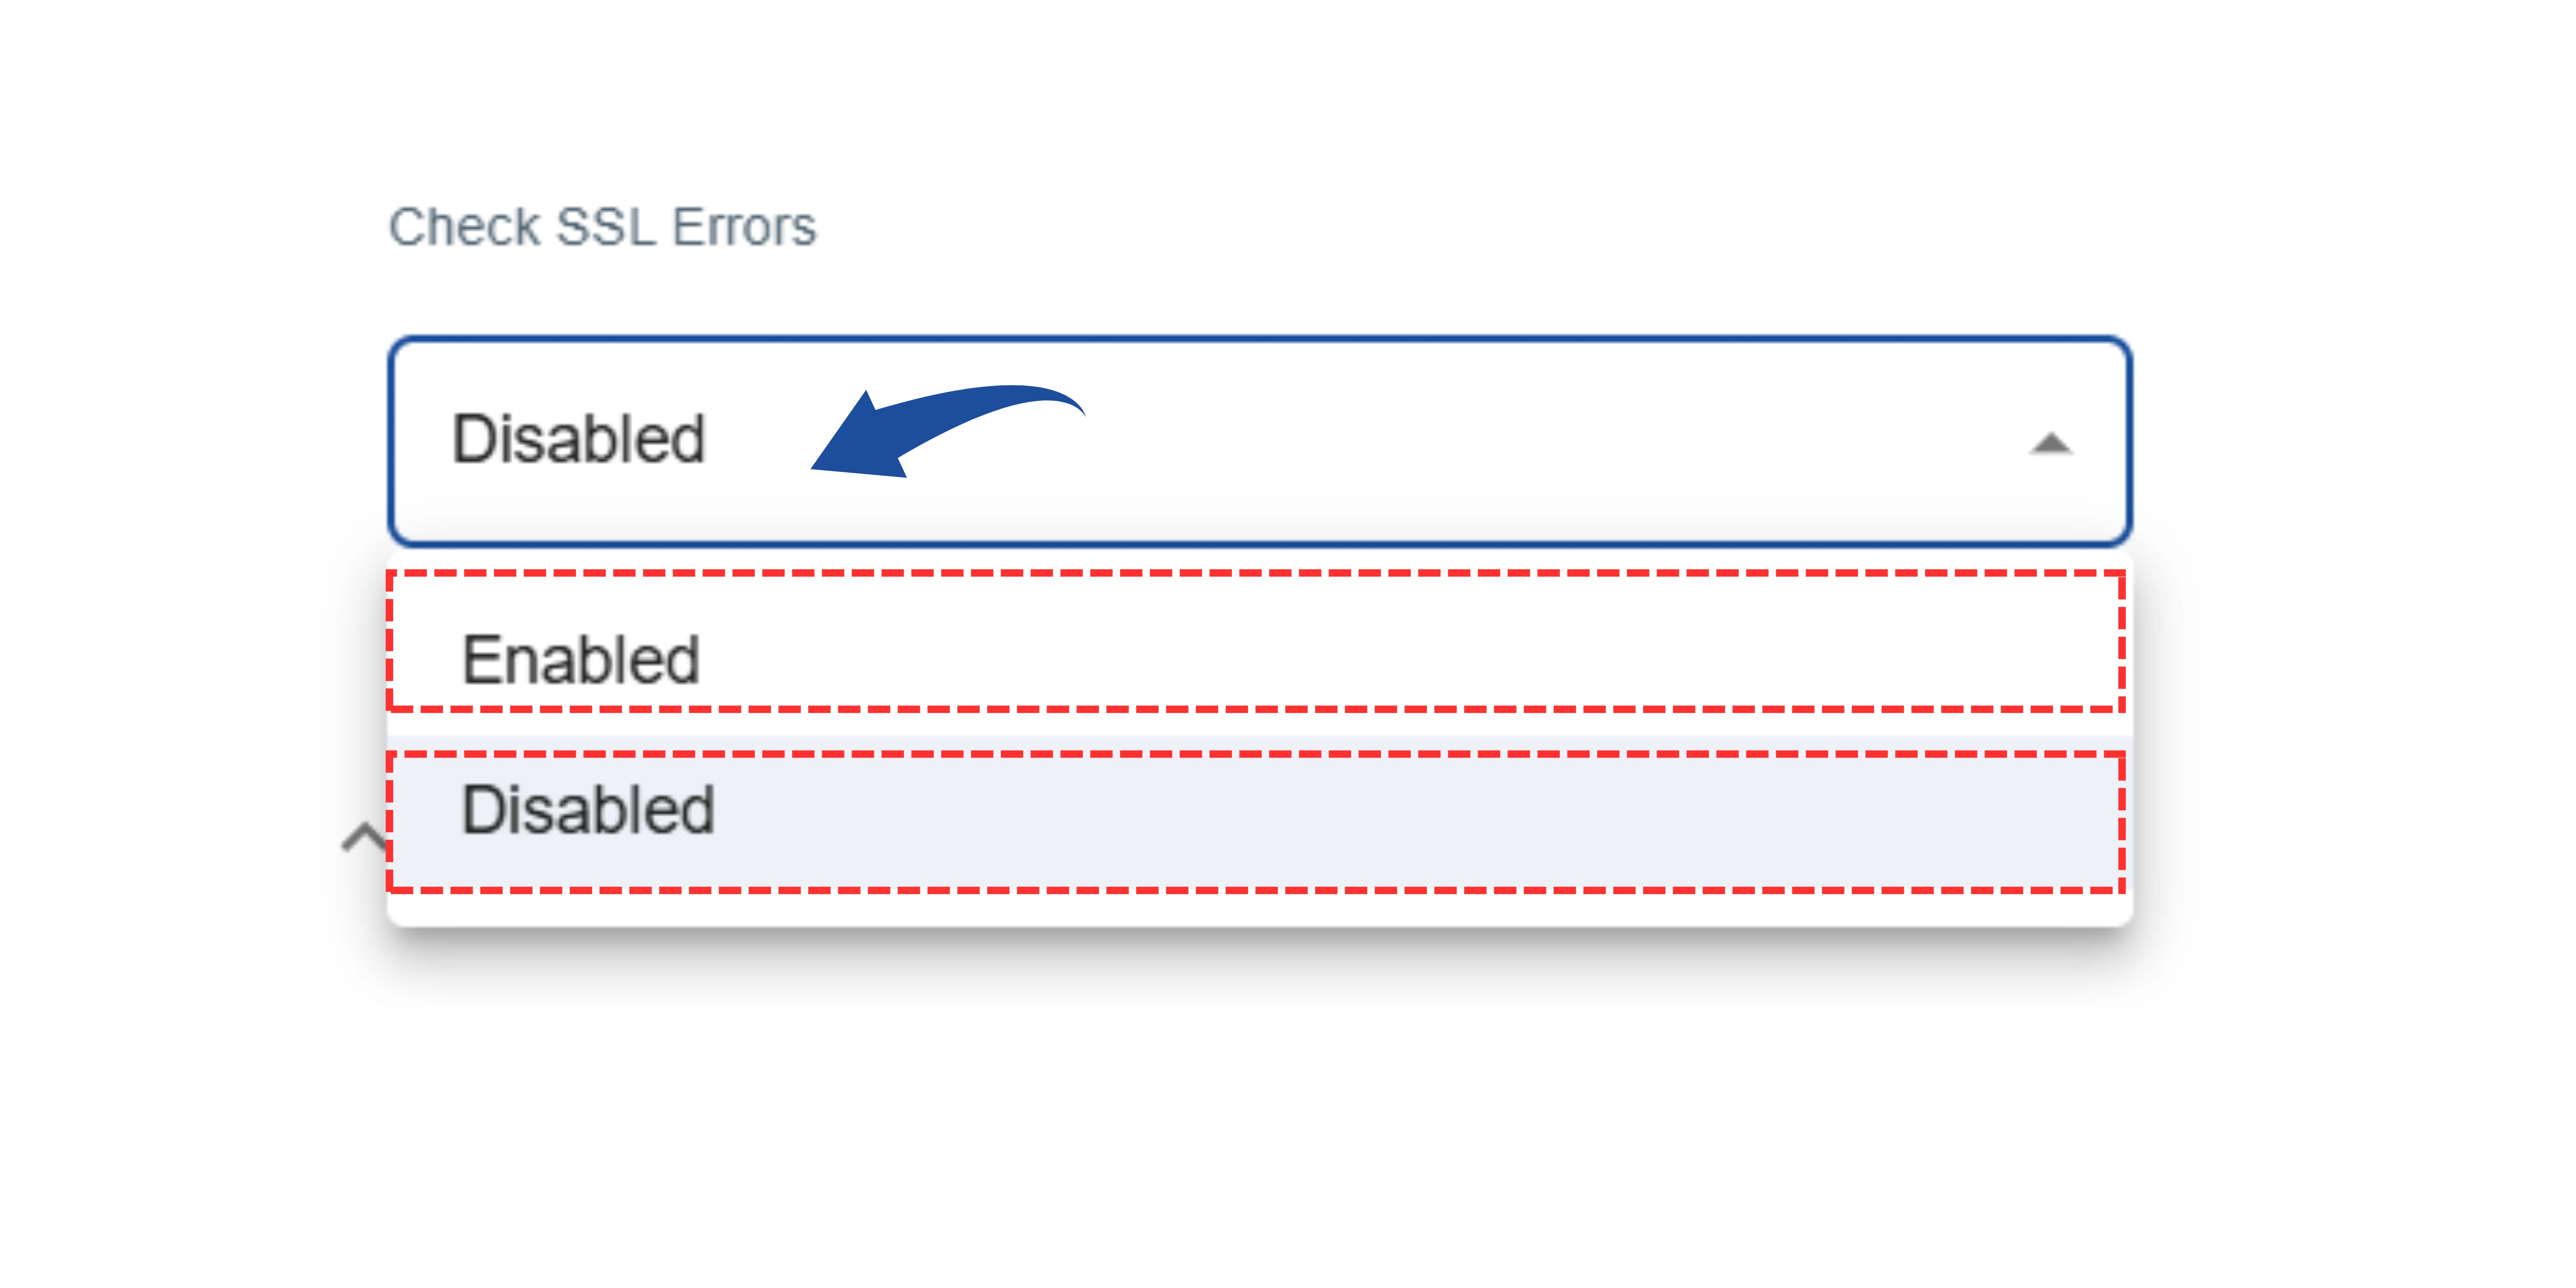
Monitors if your website has active SSL/TLS certificate errors (e.g., certificate not trusted, expired, name mismatch).
- Disabled: System will not check SSL errors.
- Enabled: System checks SSL errors and triggers alert if found.
SSL Expiry Reminders
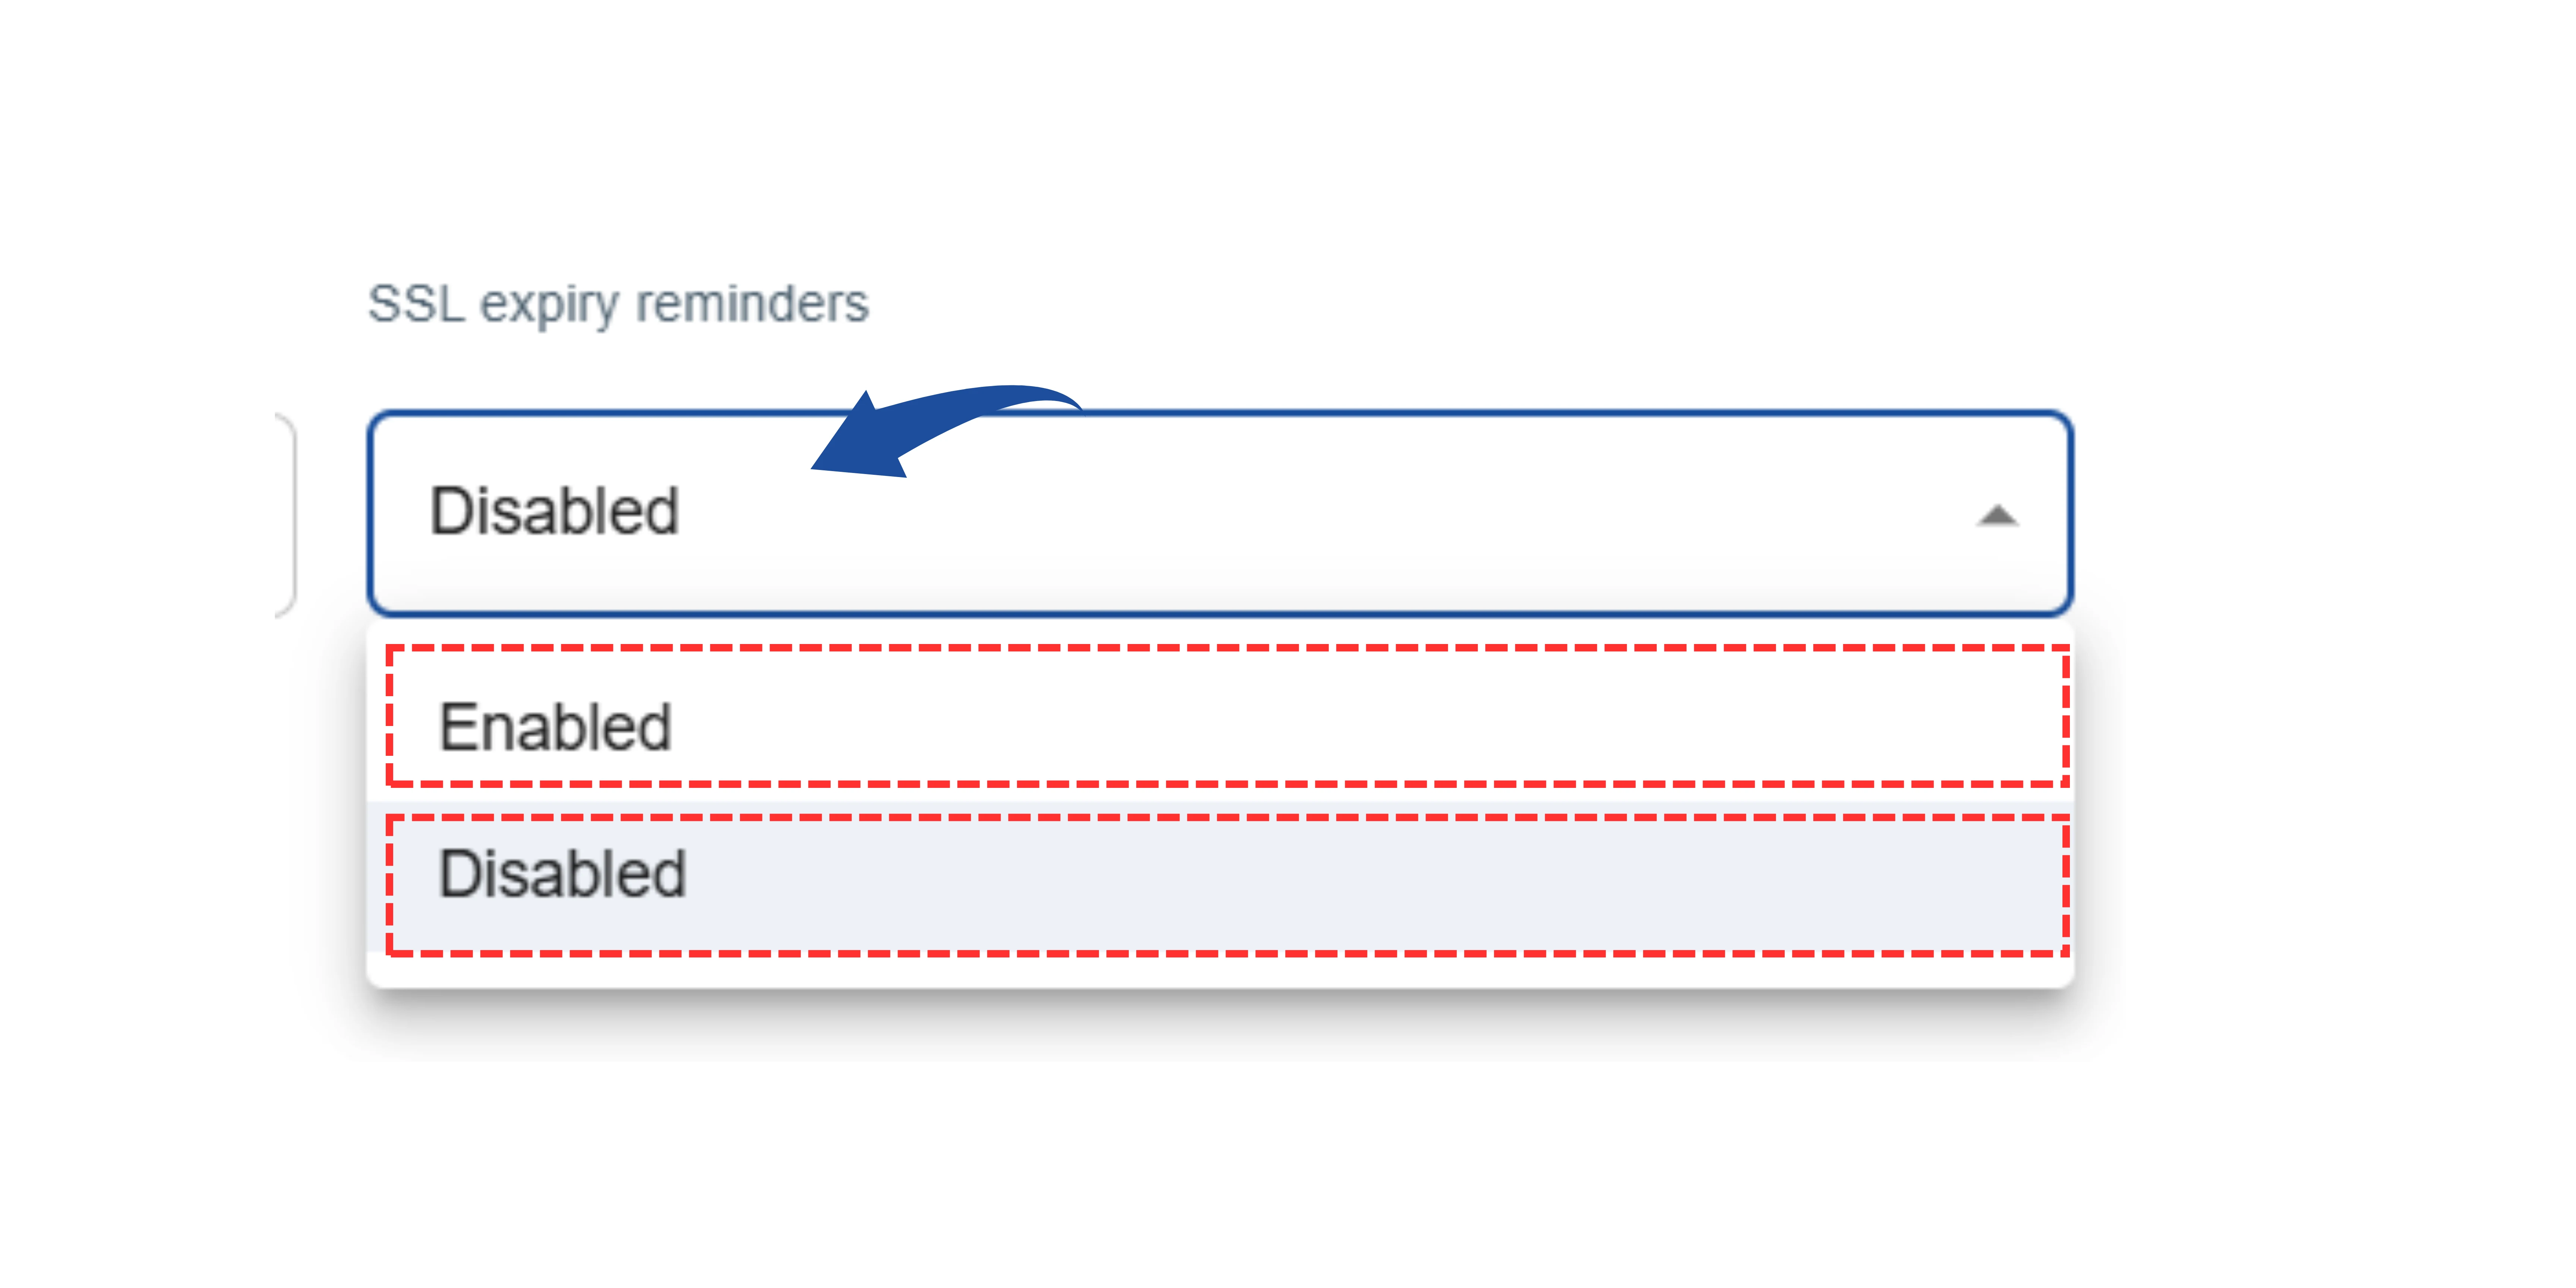
Sends proactive alerts before SSL certificate expires.
- Disabled: No reminders.
- Enabled: Receive reminders before SSL expires.
Domain Expiry Reminders
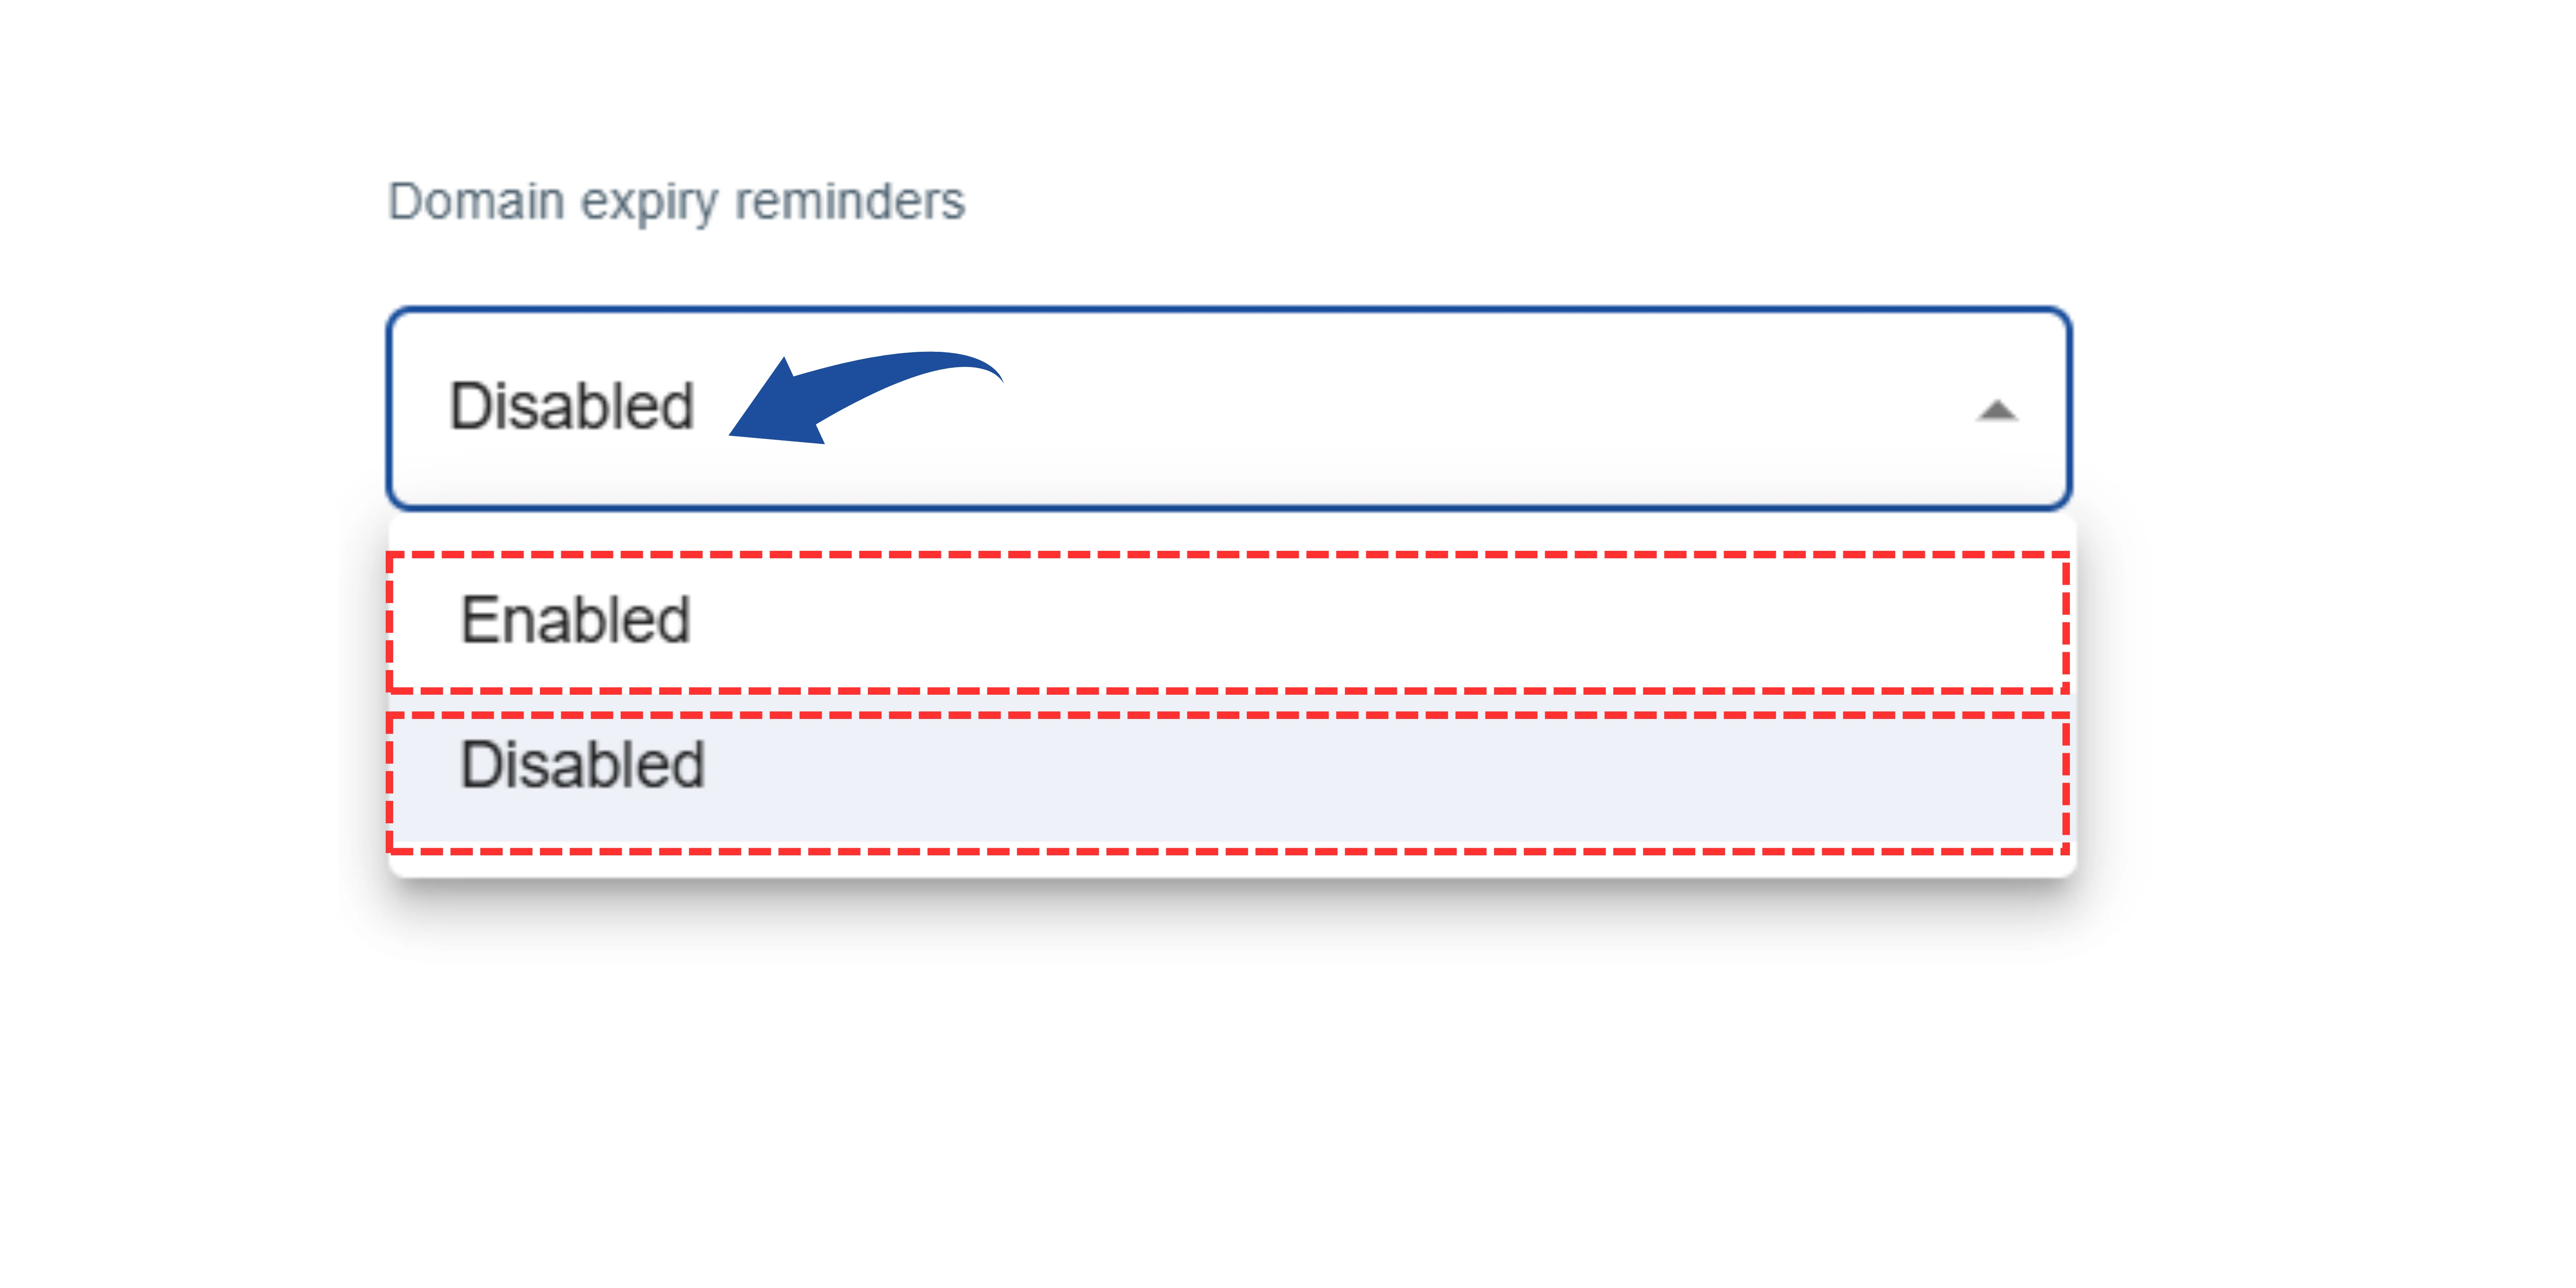
This setting monitors your website's domain name registration and alerts you before it expires.
- Disabled: You will not receive any reminders before your domain name expires.
- Enabled: The system will send you reminders when your domain registration is about to expire.
6 Premium Setting: Request Timeout
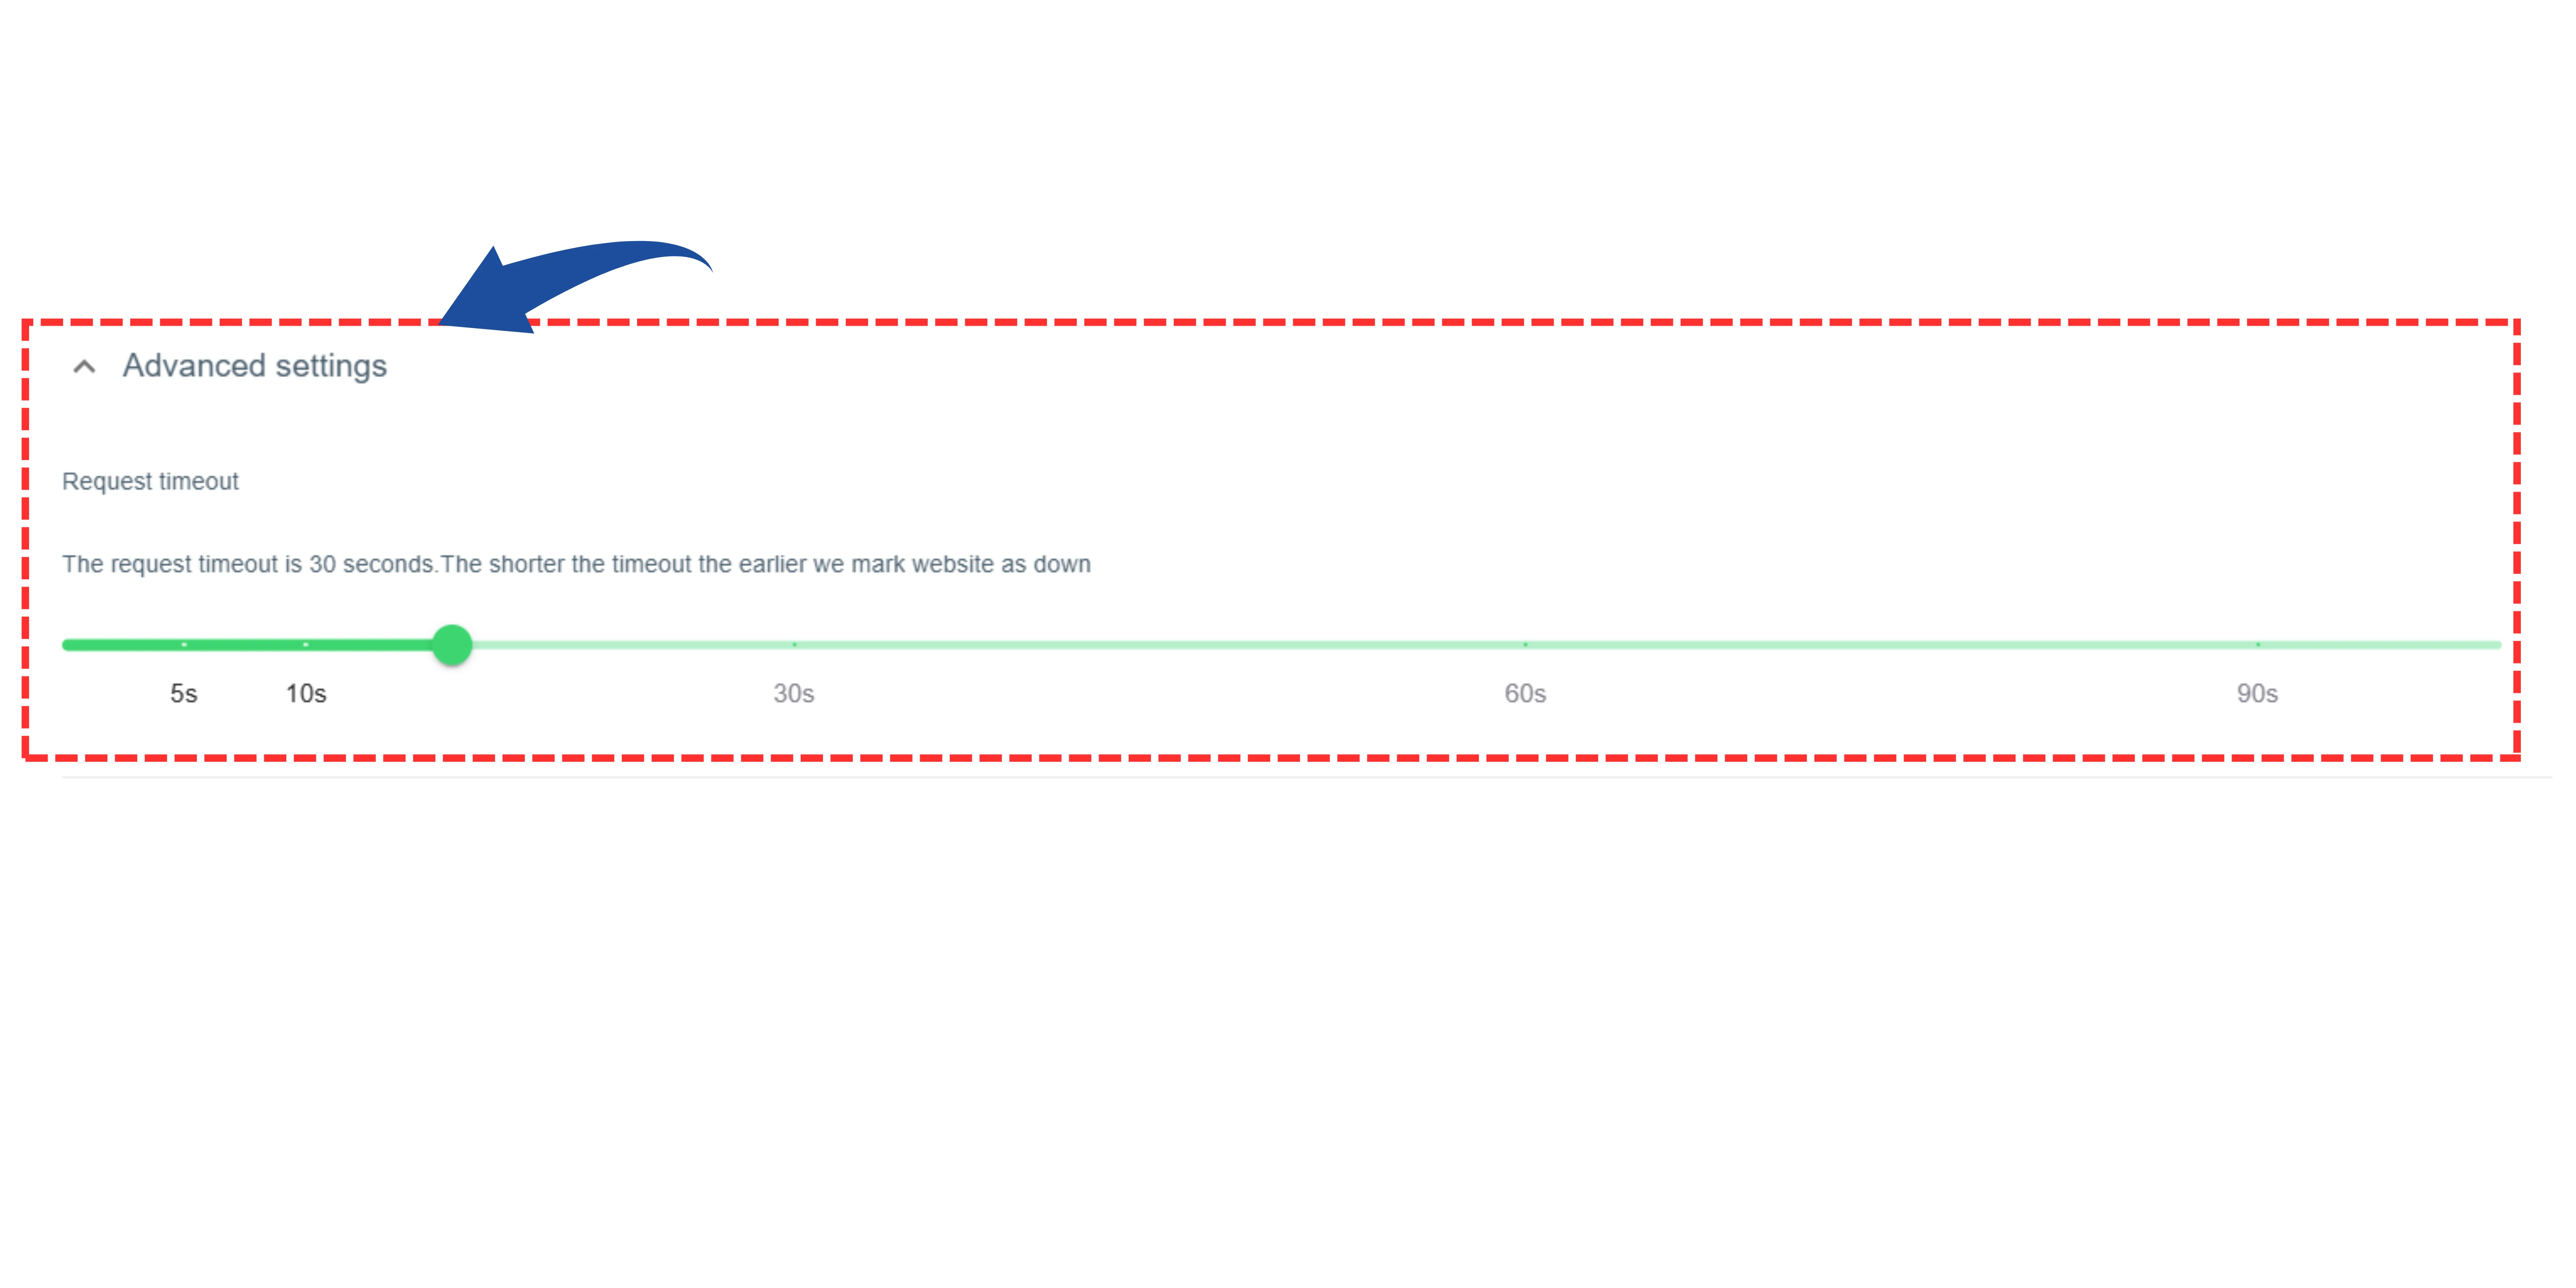
Here, you can set how long the tool should wait for a website response.
If the website does not respond within this time, it will be considered "down".
Options: 15s, 30s, 60s, 90s.
8 HTTPS Code (Premium Setting)
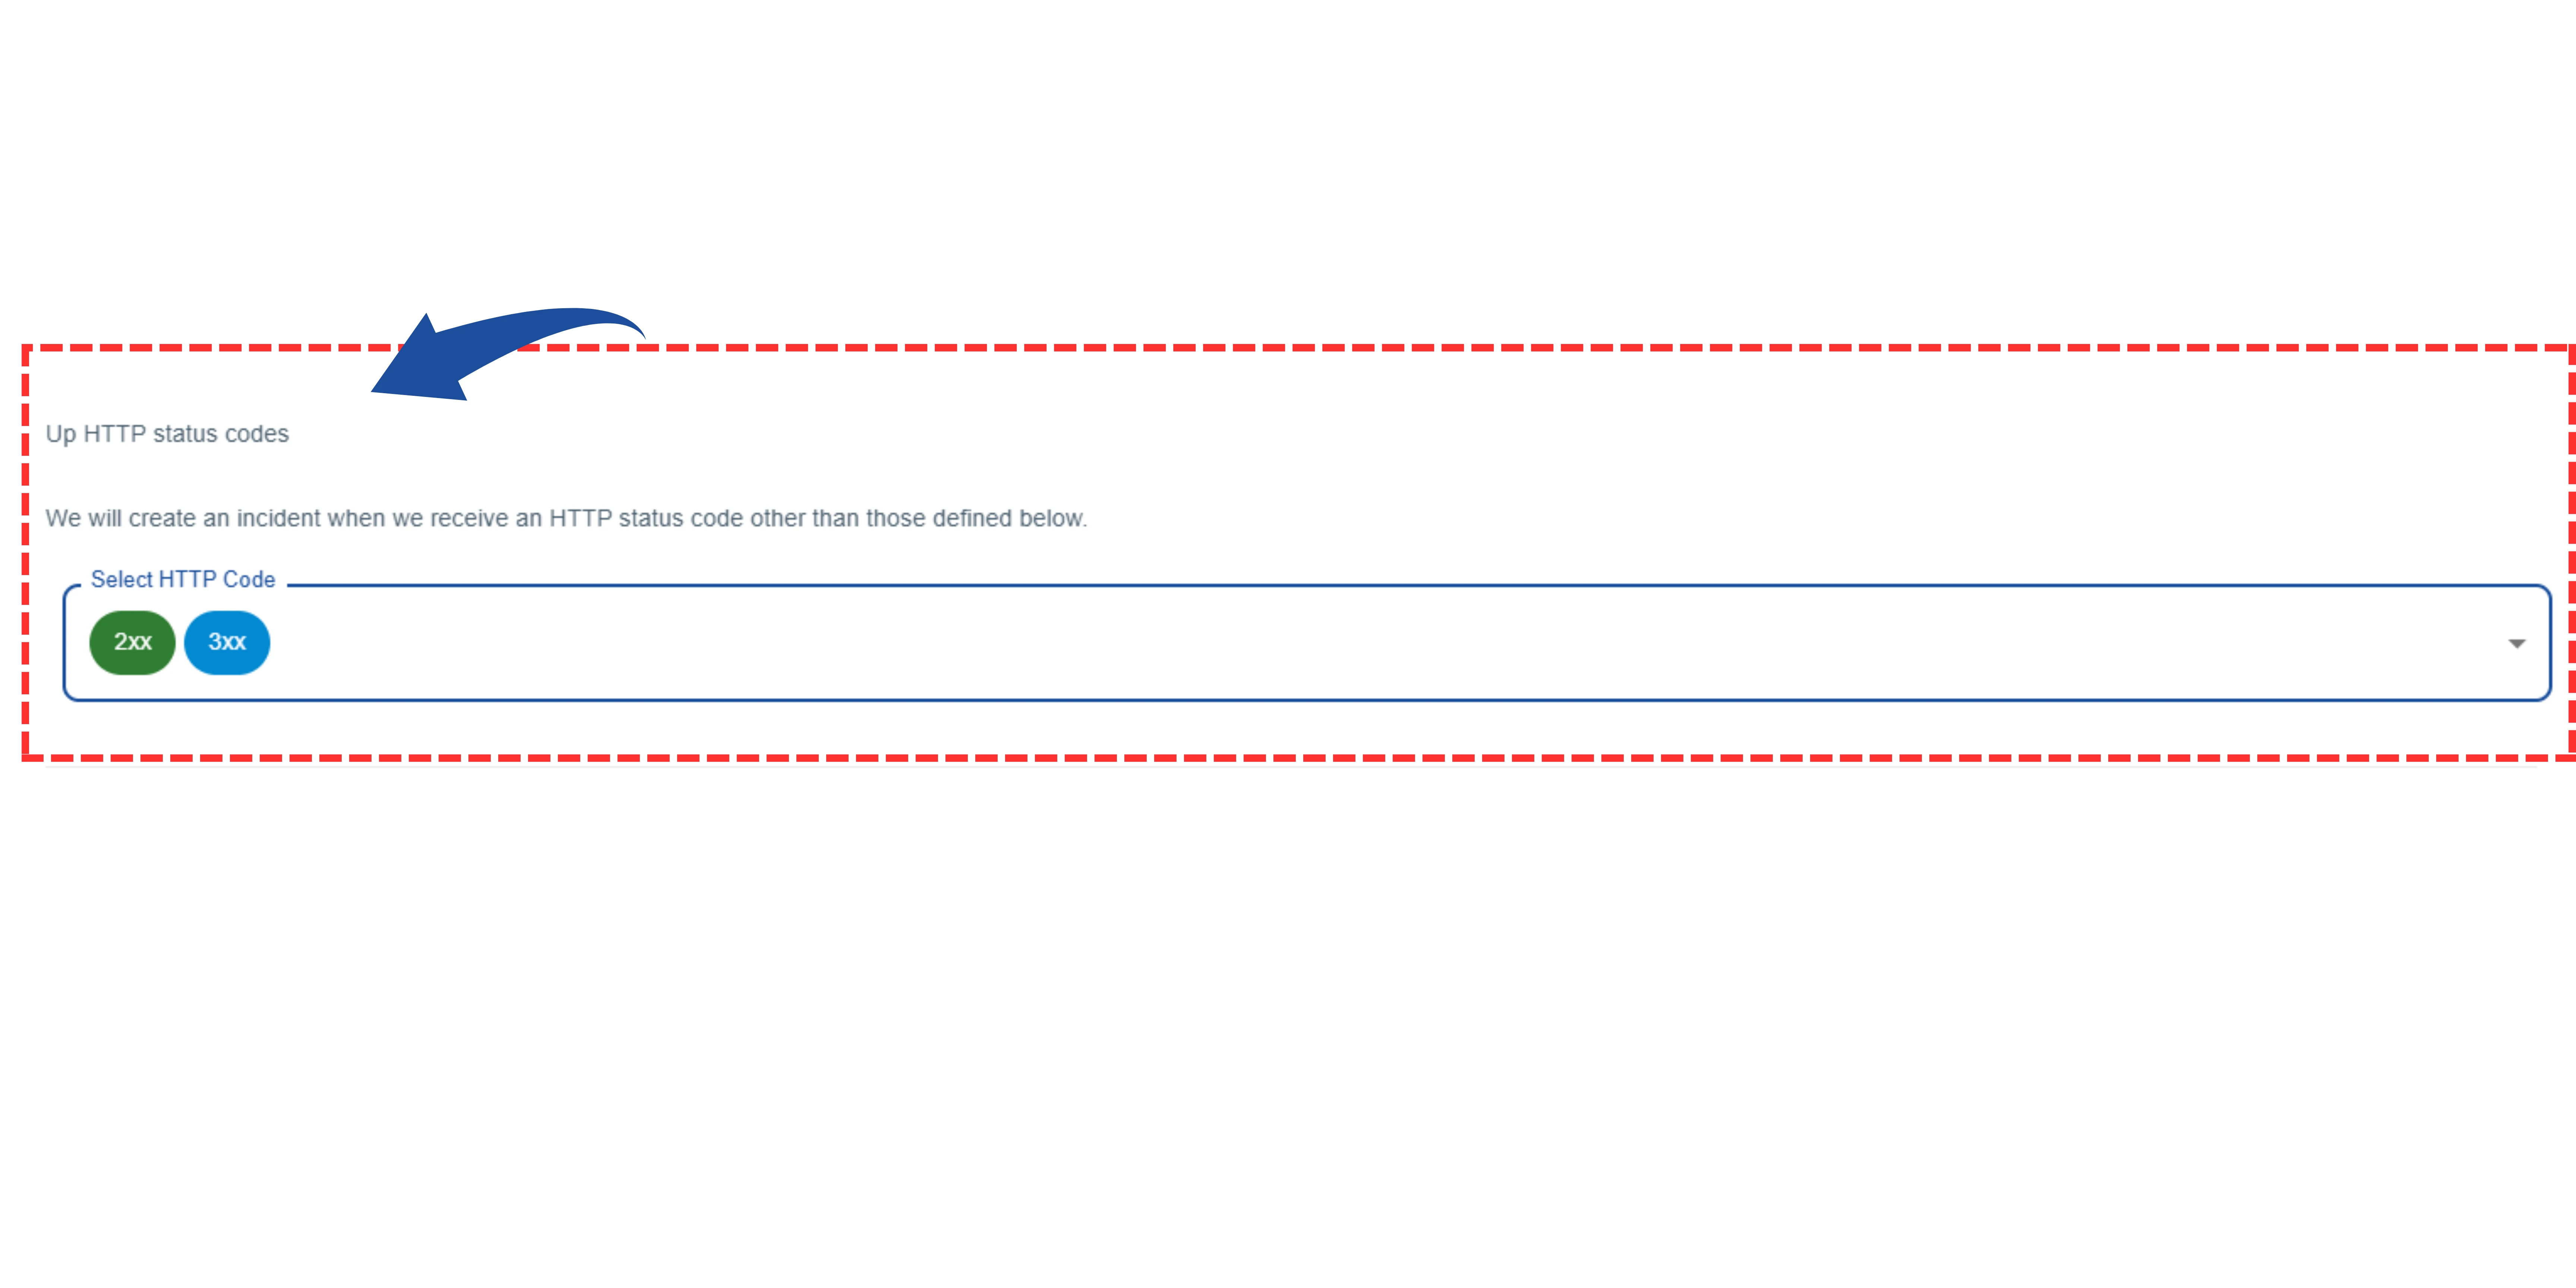
You can specify which HTTP status codes should trigger an alert.
For example: If any status code other than 200 (OK) is received, an incident will be created.
9 Authentication Type (Premium Setting)
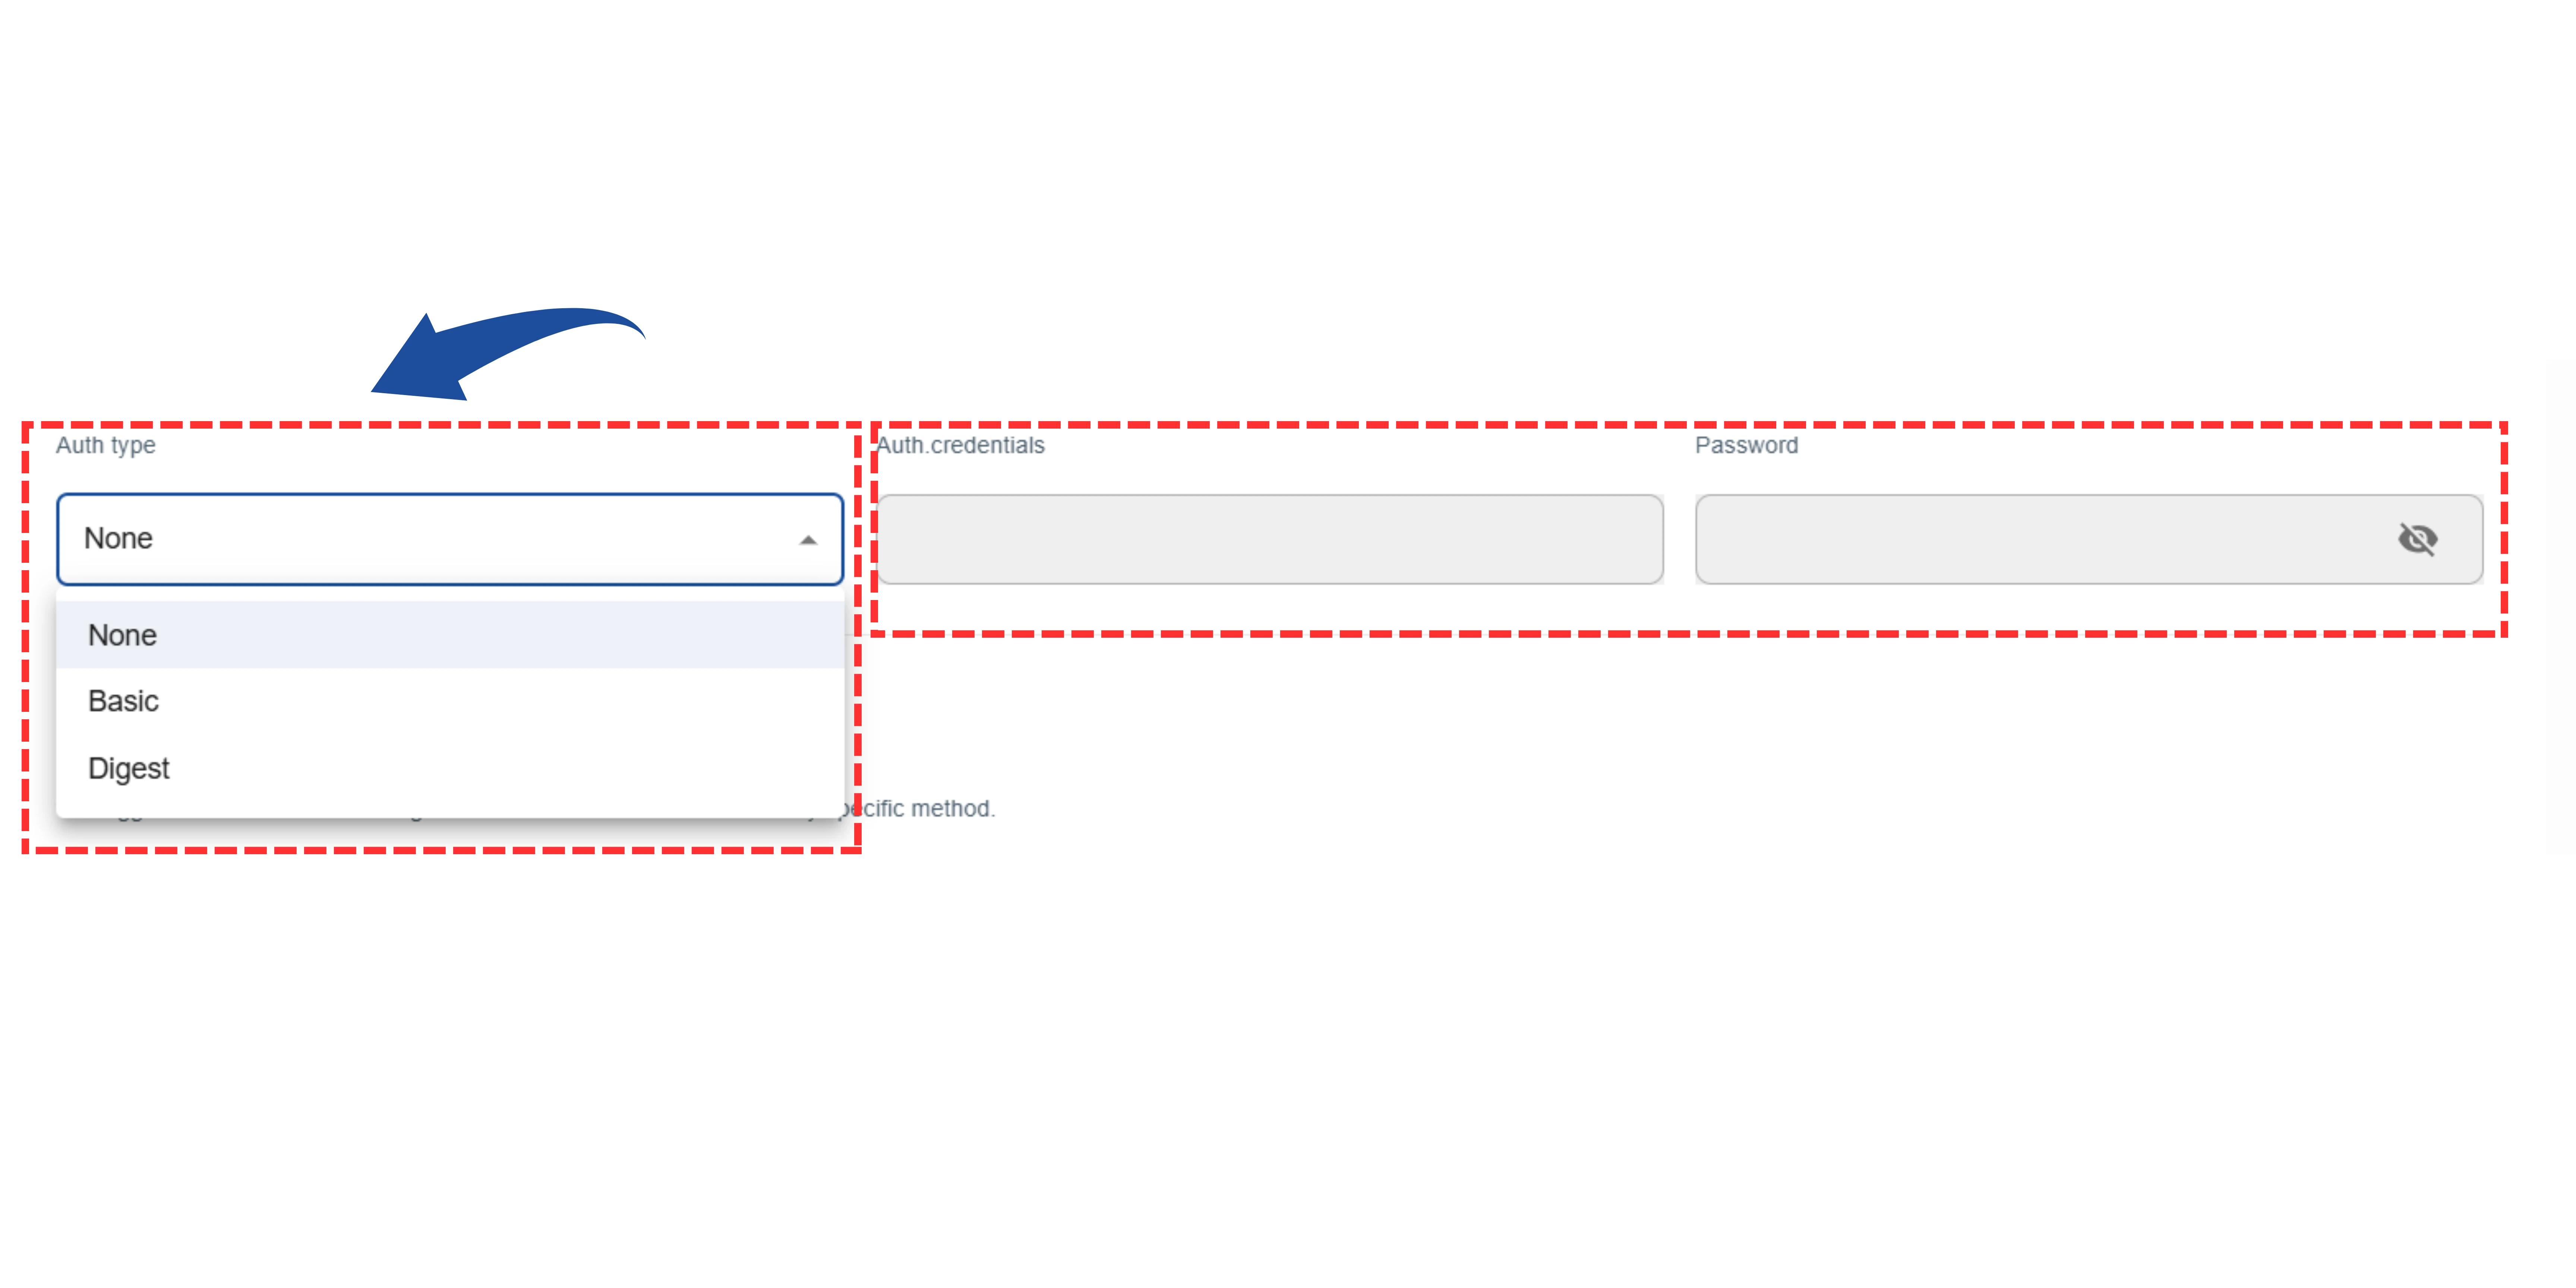
For password-protected websites, choose authentication type: Basic or Digest. Enter your username and password.
10 HTTP Method
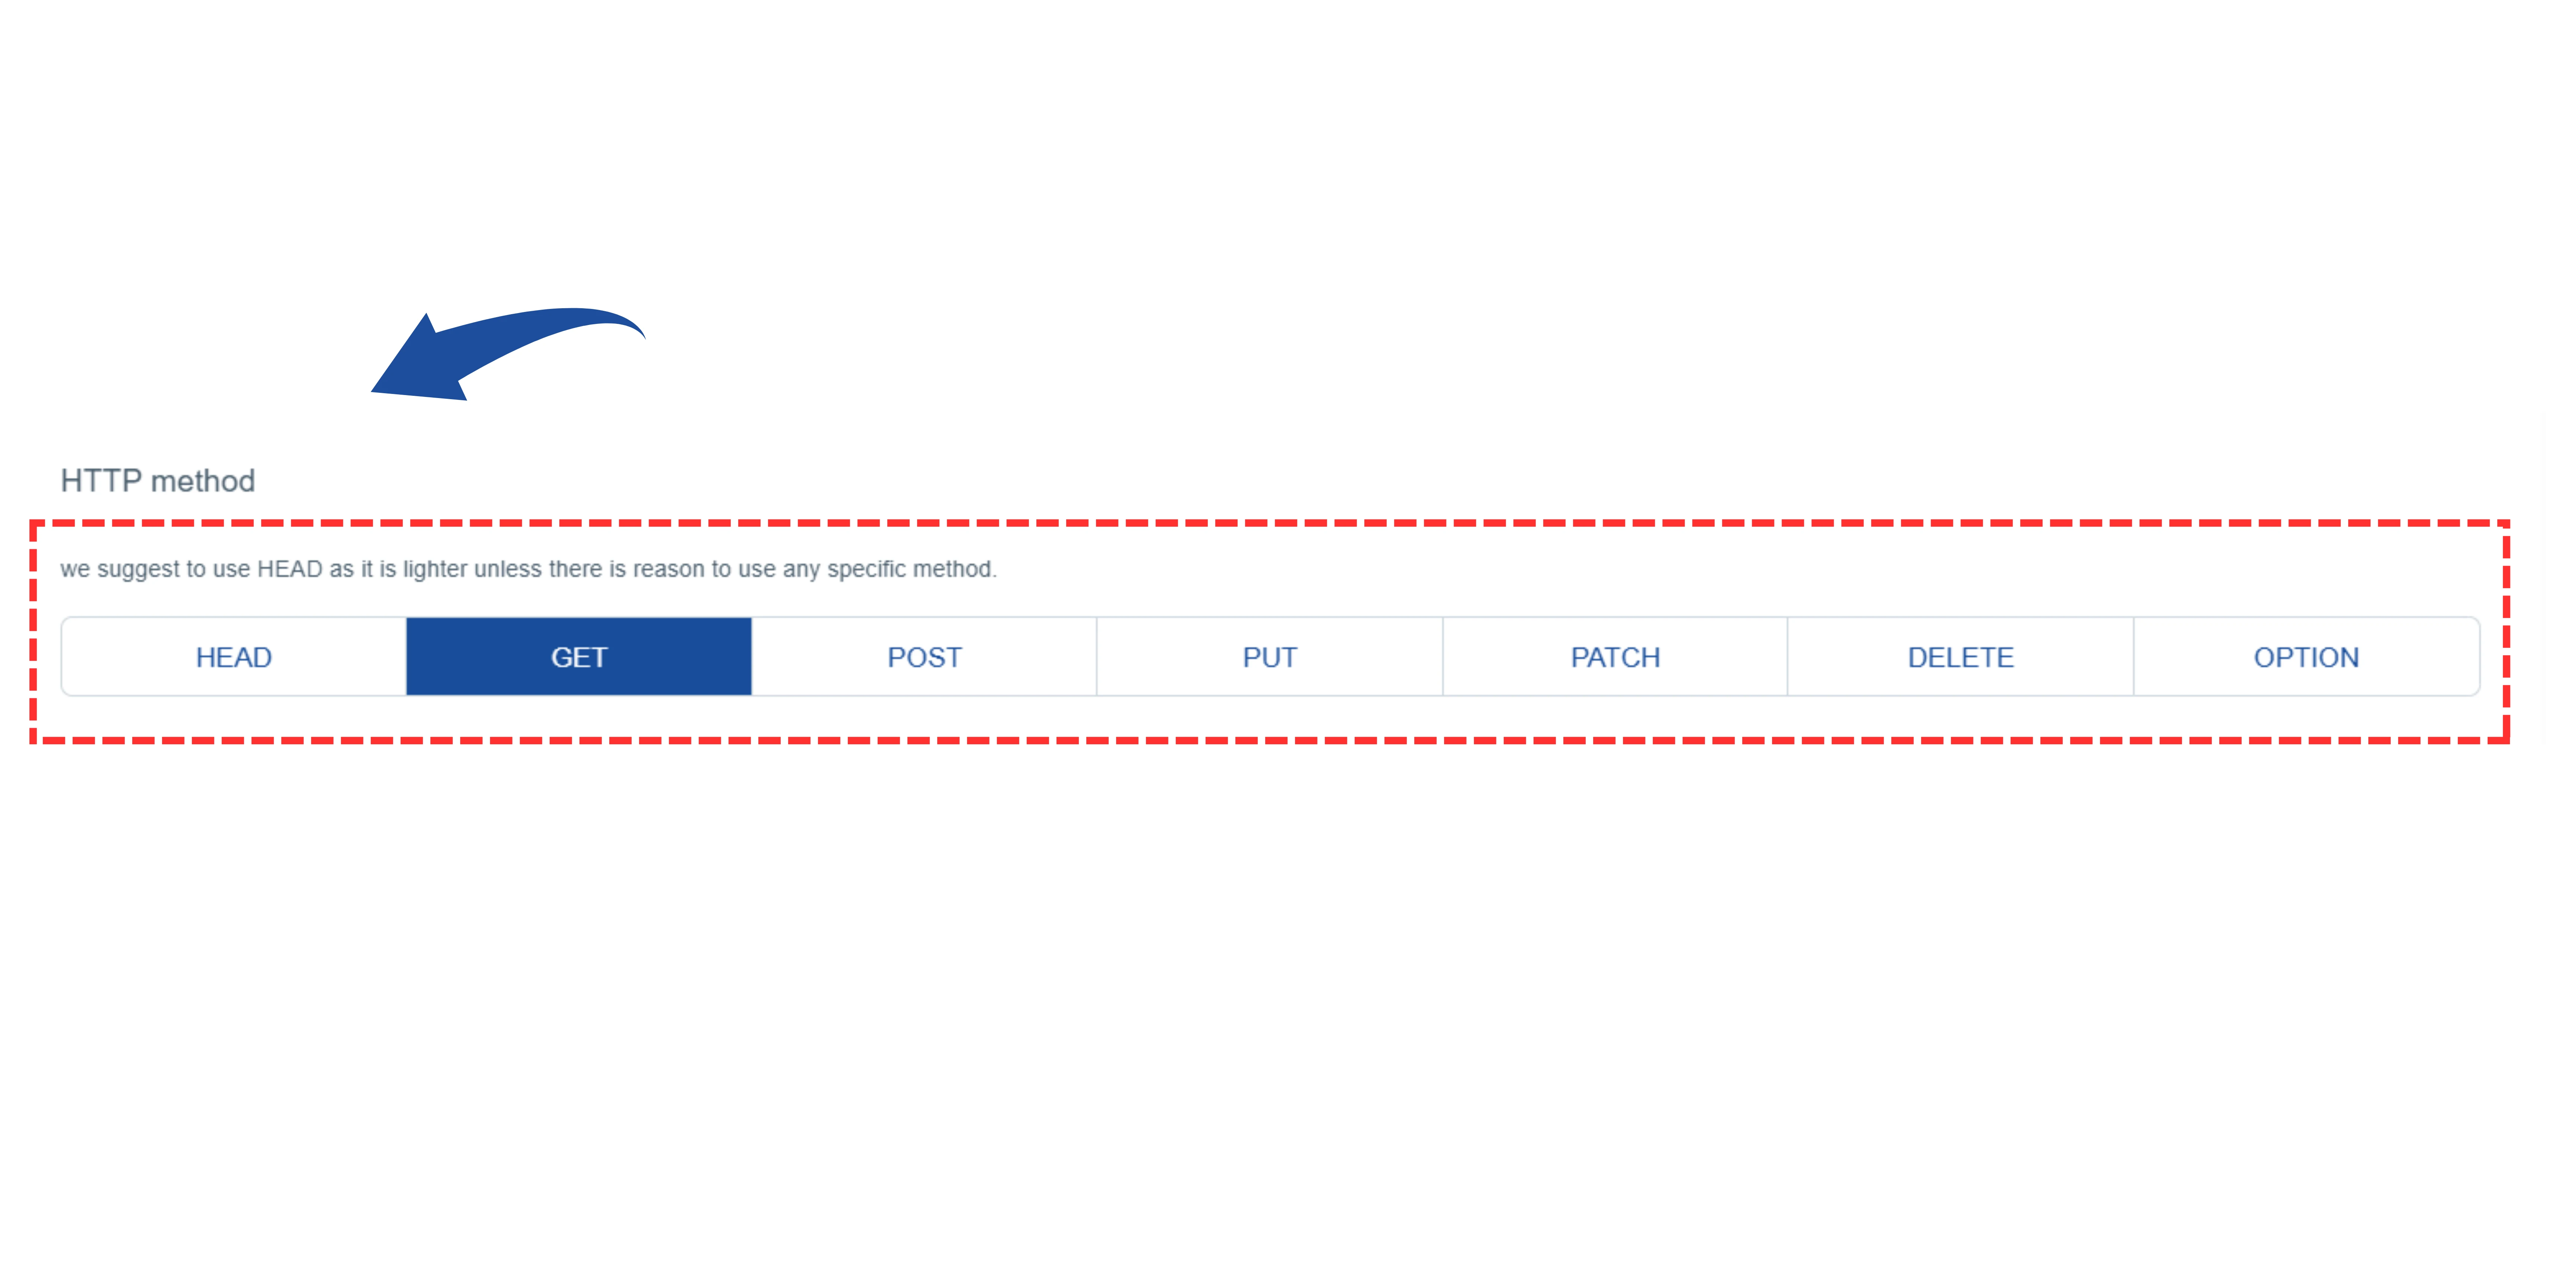
Tool recommends HEAD method to reduce server load. Other options: GET, POST, PUT, DELETE, etc.
11 Add Tag and Create the Monitor
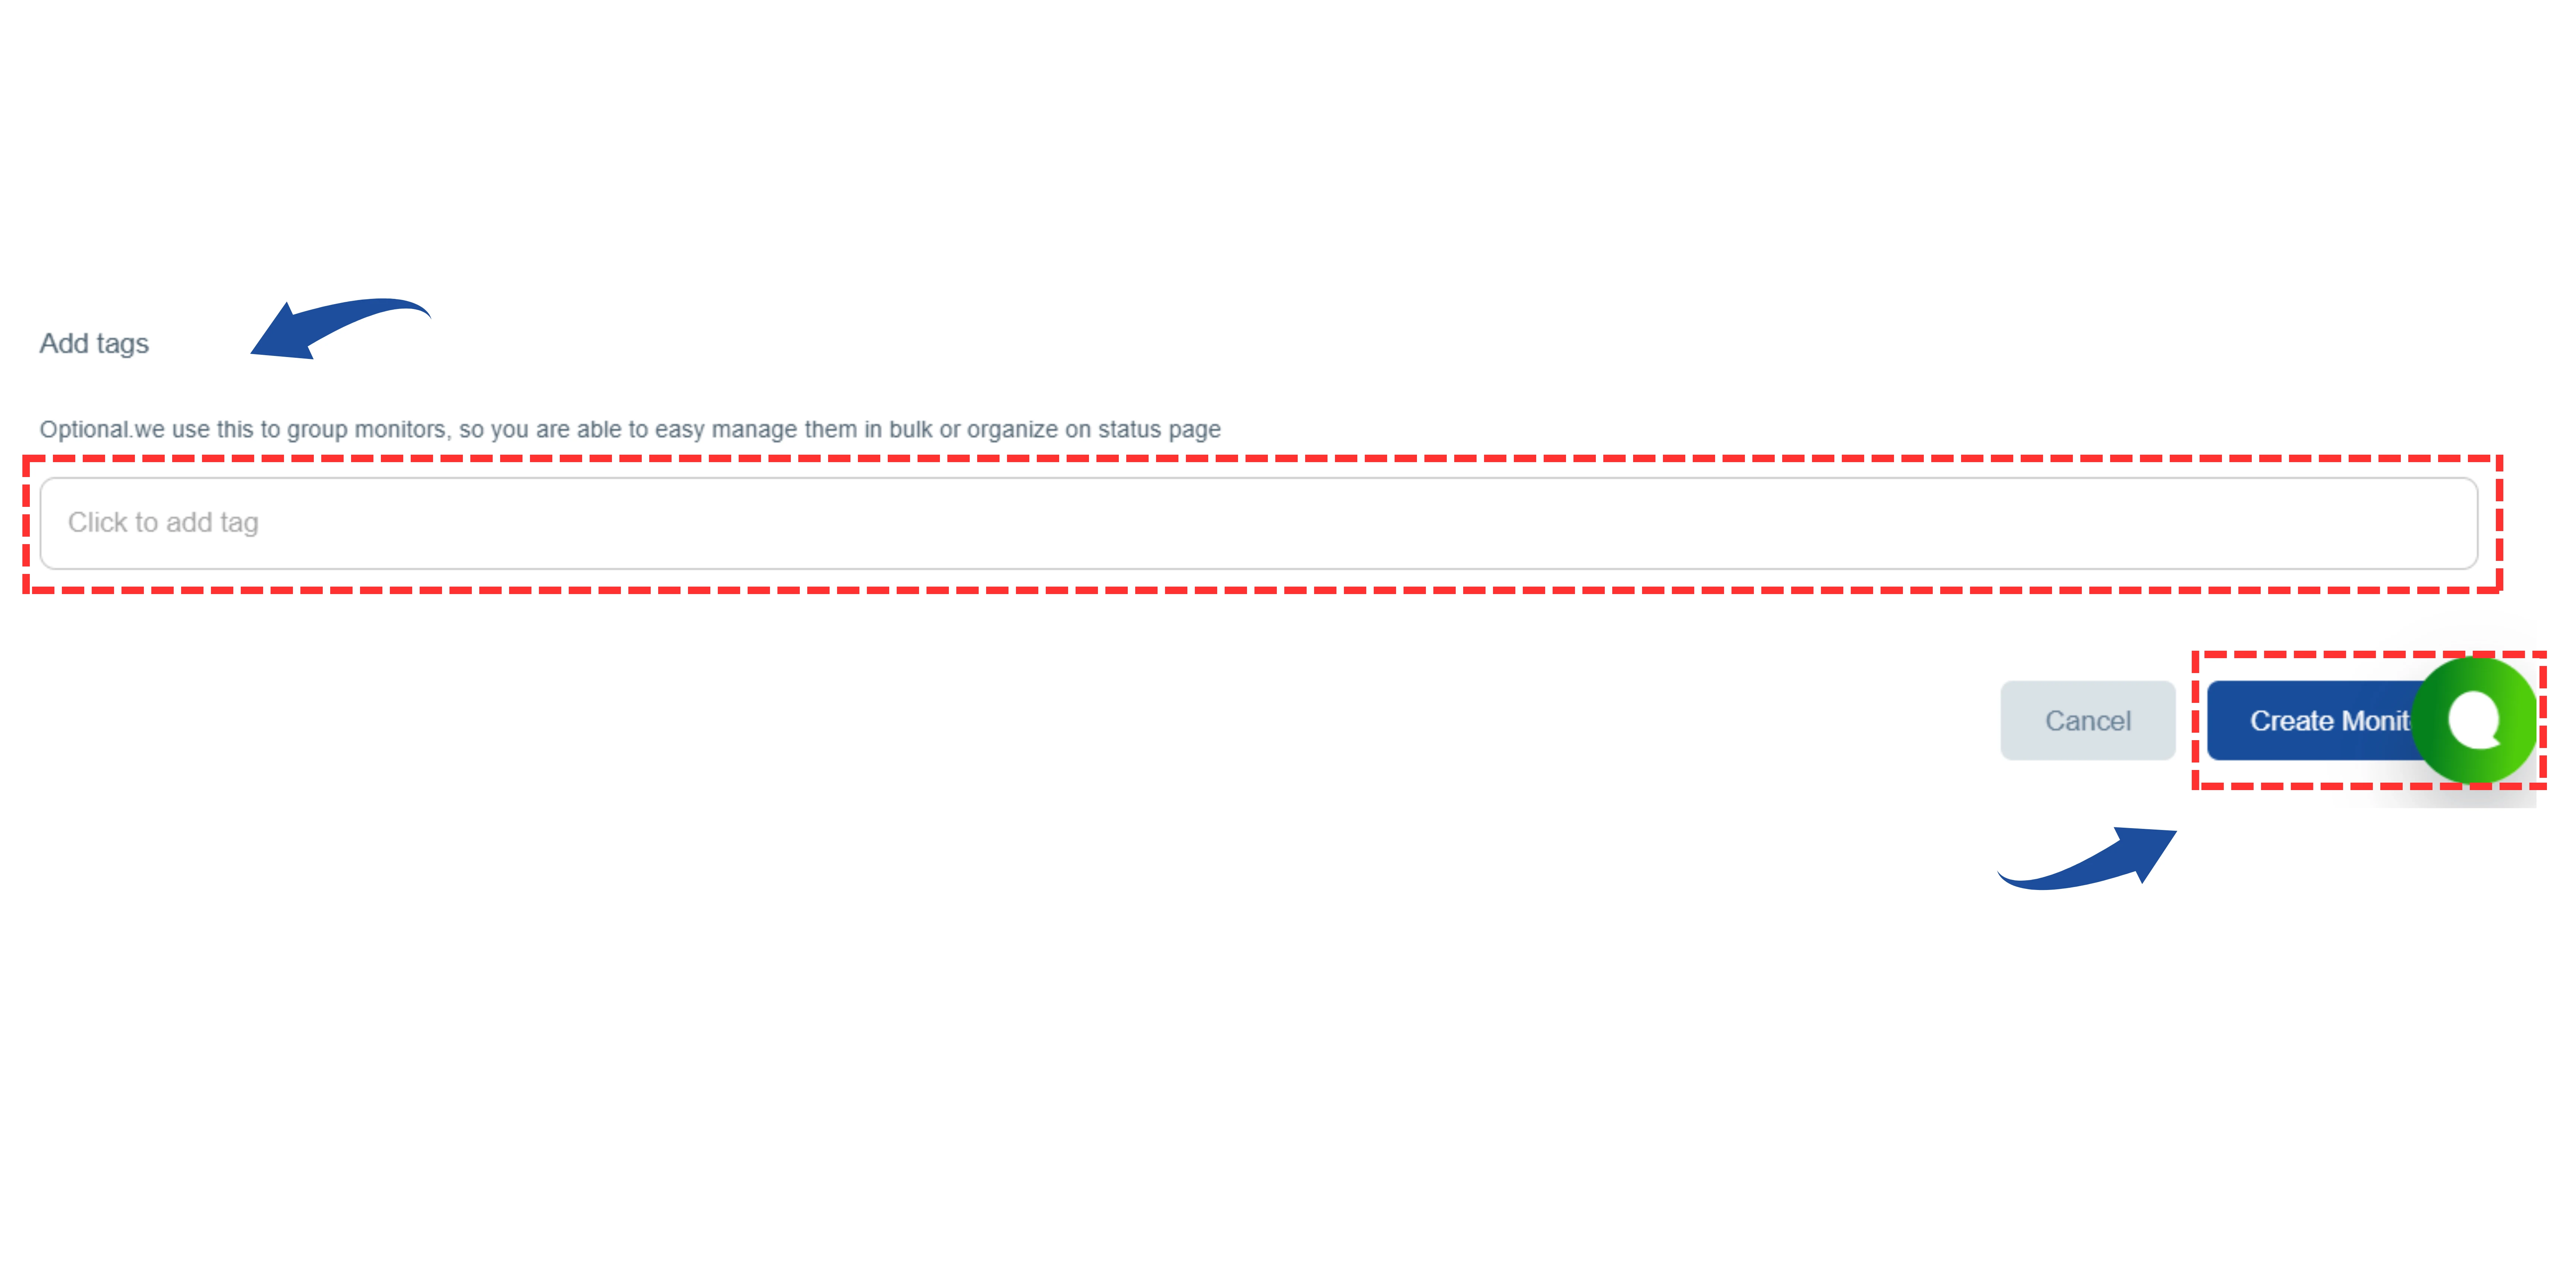
Tags (optional): Group monitors for easier management or status page organization. Click "Create Monitor" to finish.