Adding a Ping to Your Monitoring Dashboard
This guide will show you how to set up ping monitoring to check device connectivity. Learn to configure ICMP checks and alerts to ensure your network uptime and server availability.
1 Go to Your Dashboard
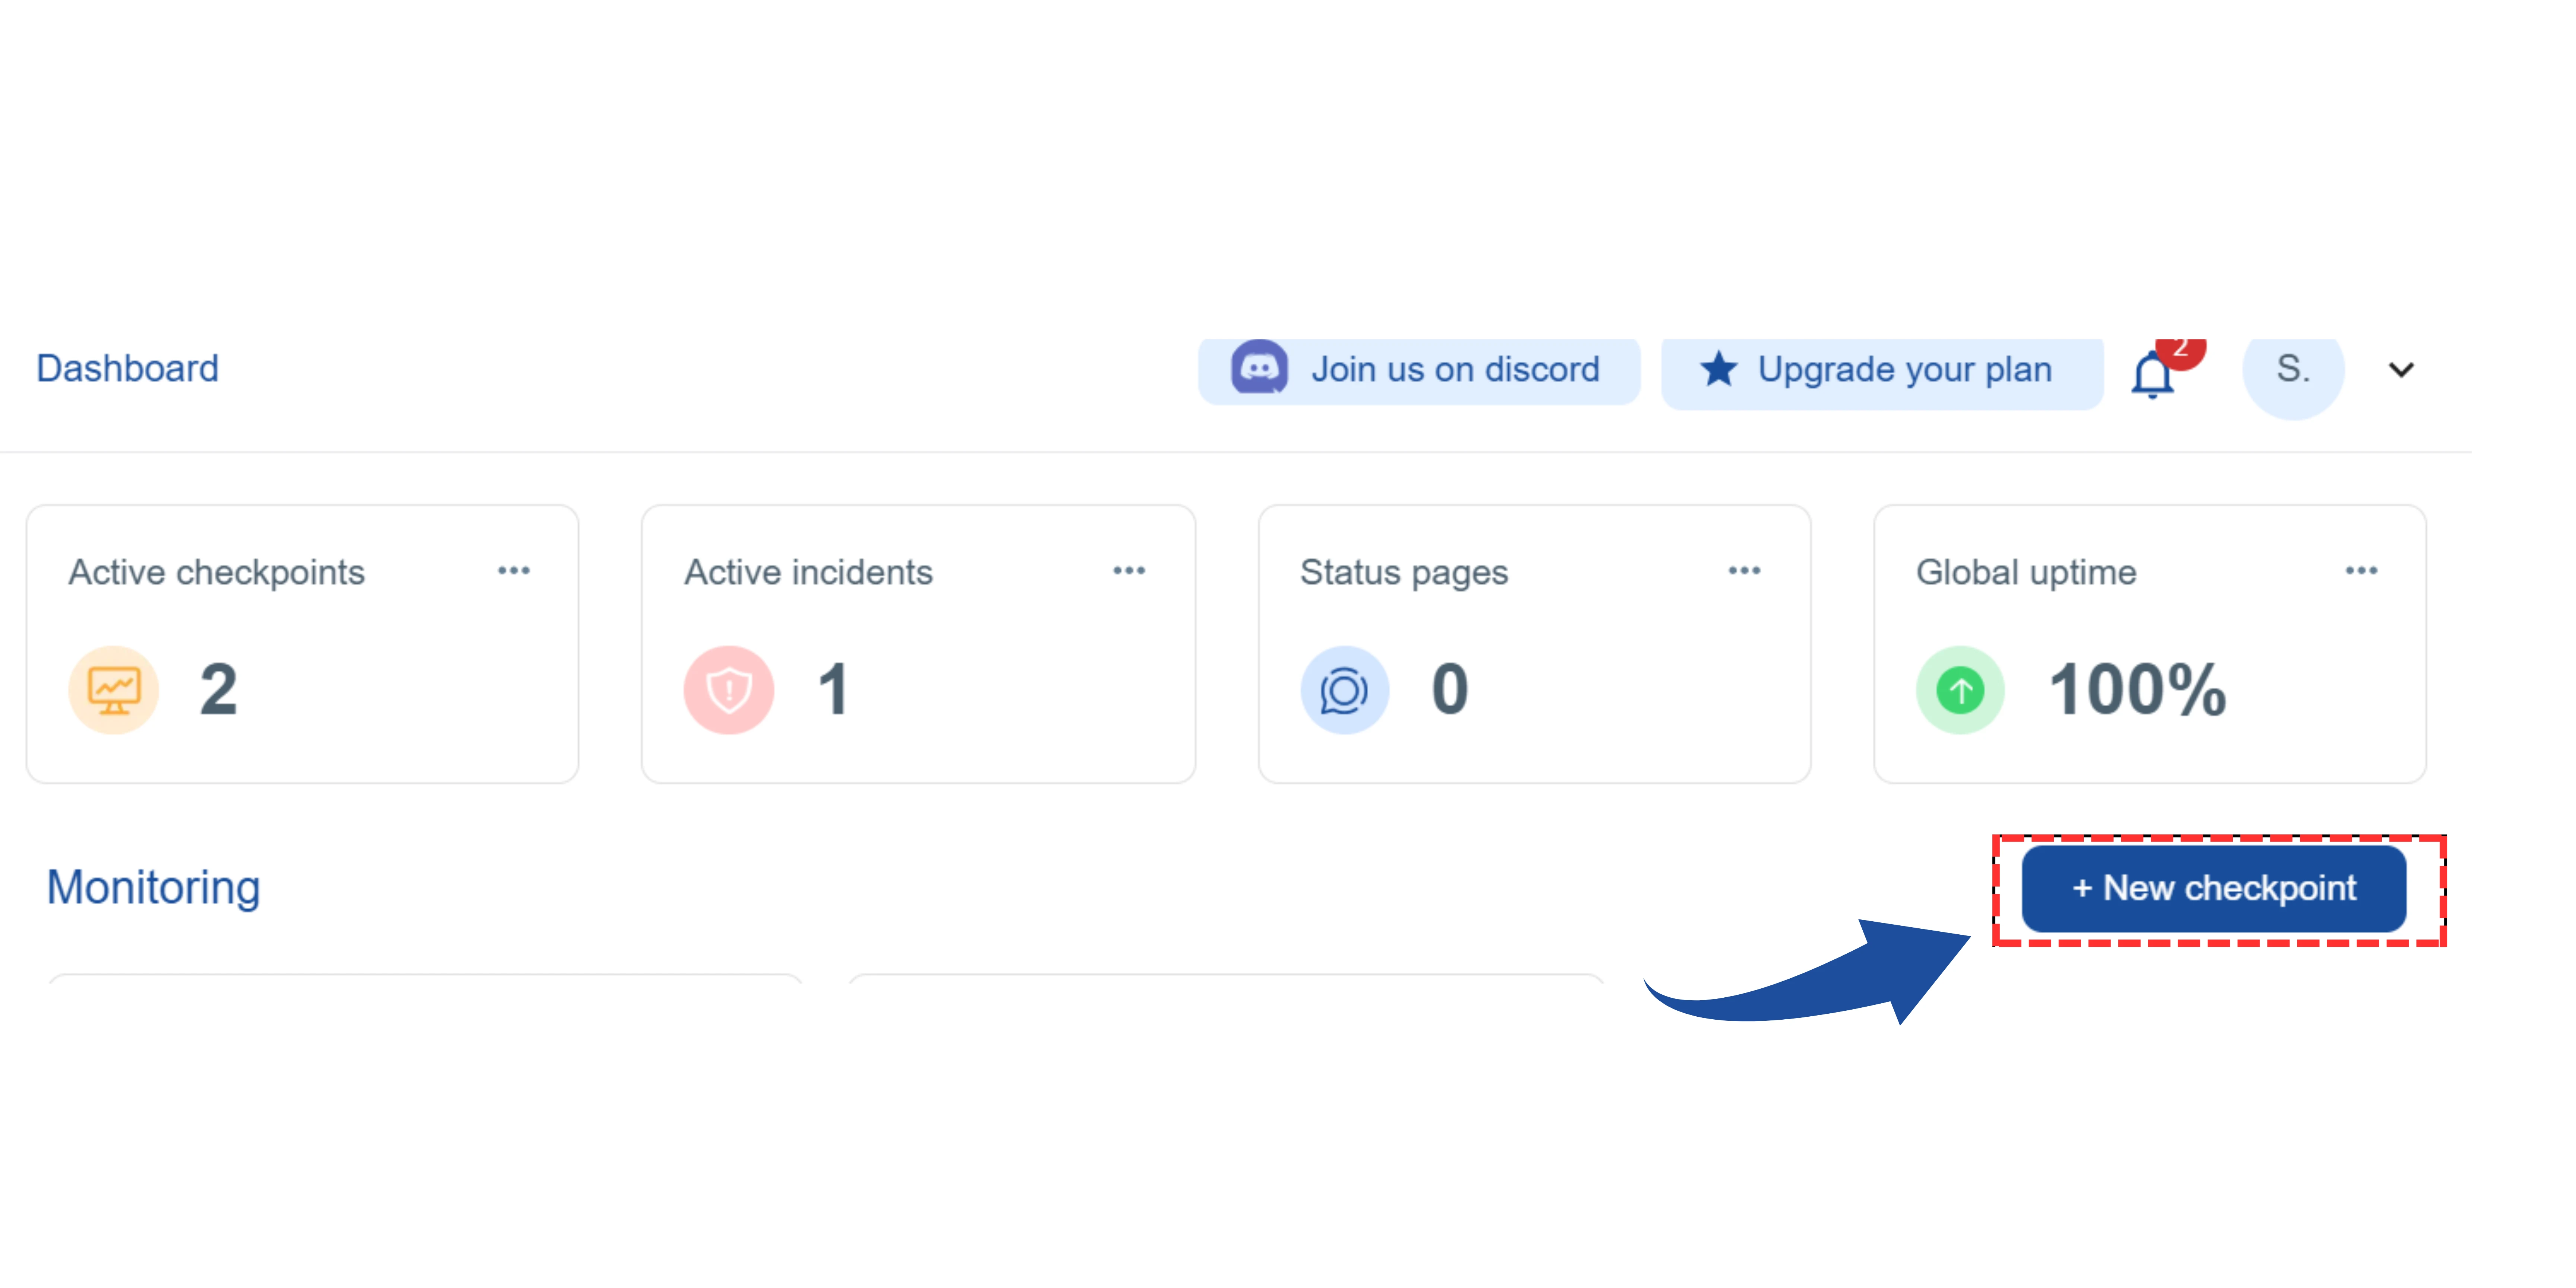
On your main dashboard, you will see the "New Checkpoint" button. Click on it.
2 Select the Checkpoint Type
You will be redirected to the"Add Checkpoint" page.

Look for the "Checkpoint Type" option.
From the list, select "Ping Monitoring".
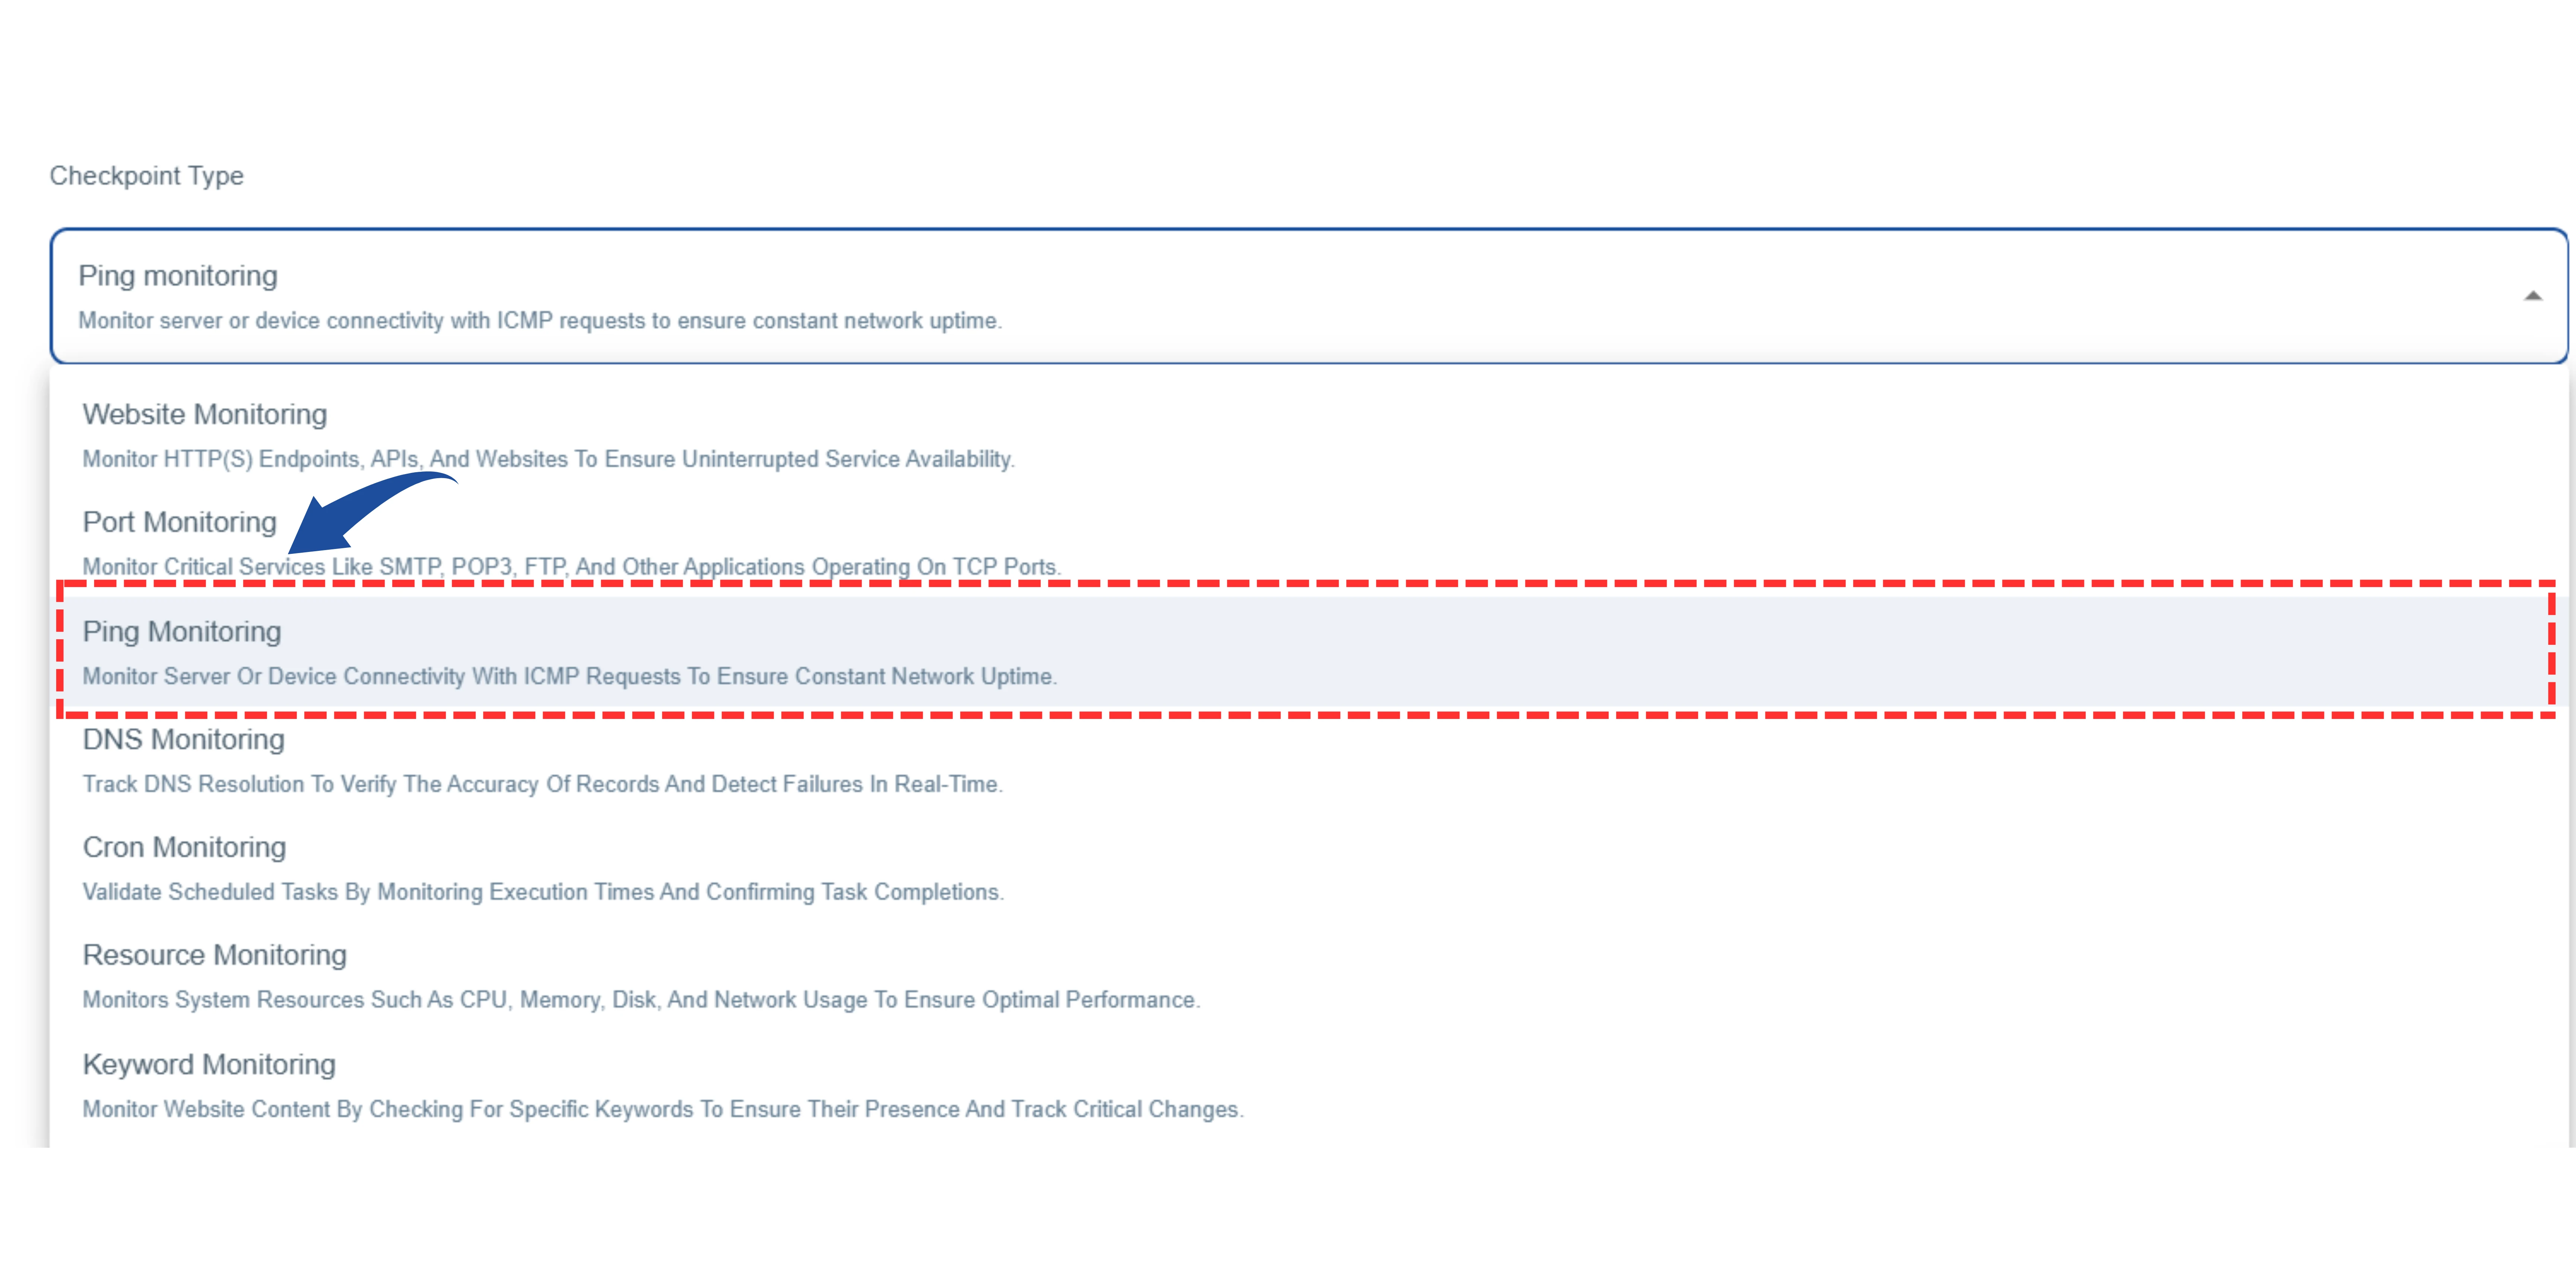
- This type monitors server or device connectivity by sending ICMP requests to ensure network uptime.
- Under "Checkpoint Type", select "Ping Monitoring"
- Note: This tool also has other monitoring types like Port, Website, Keyword, etc., but for checking a website, you should choose "Ping Monitoring".
3 Name Your Monitor and Enter the Target
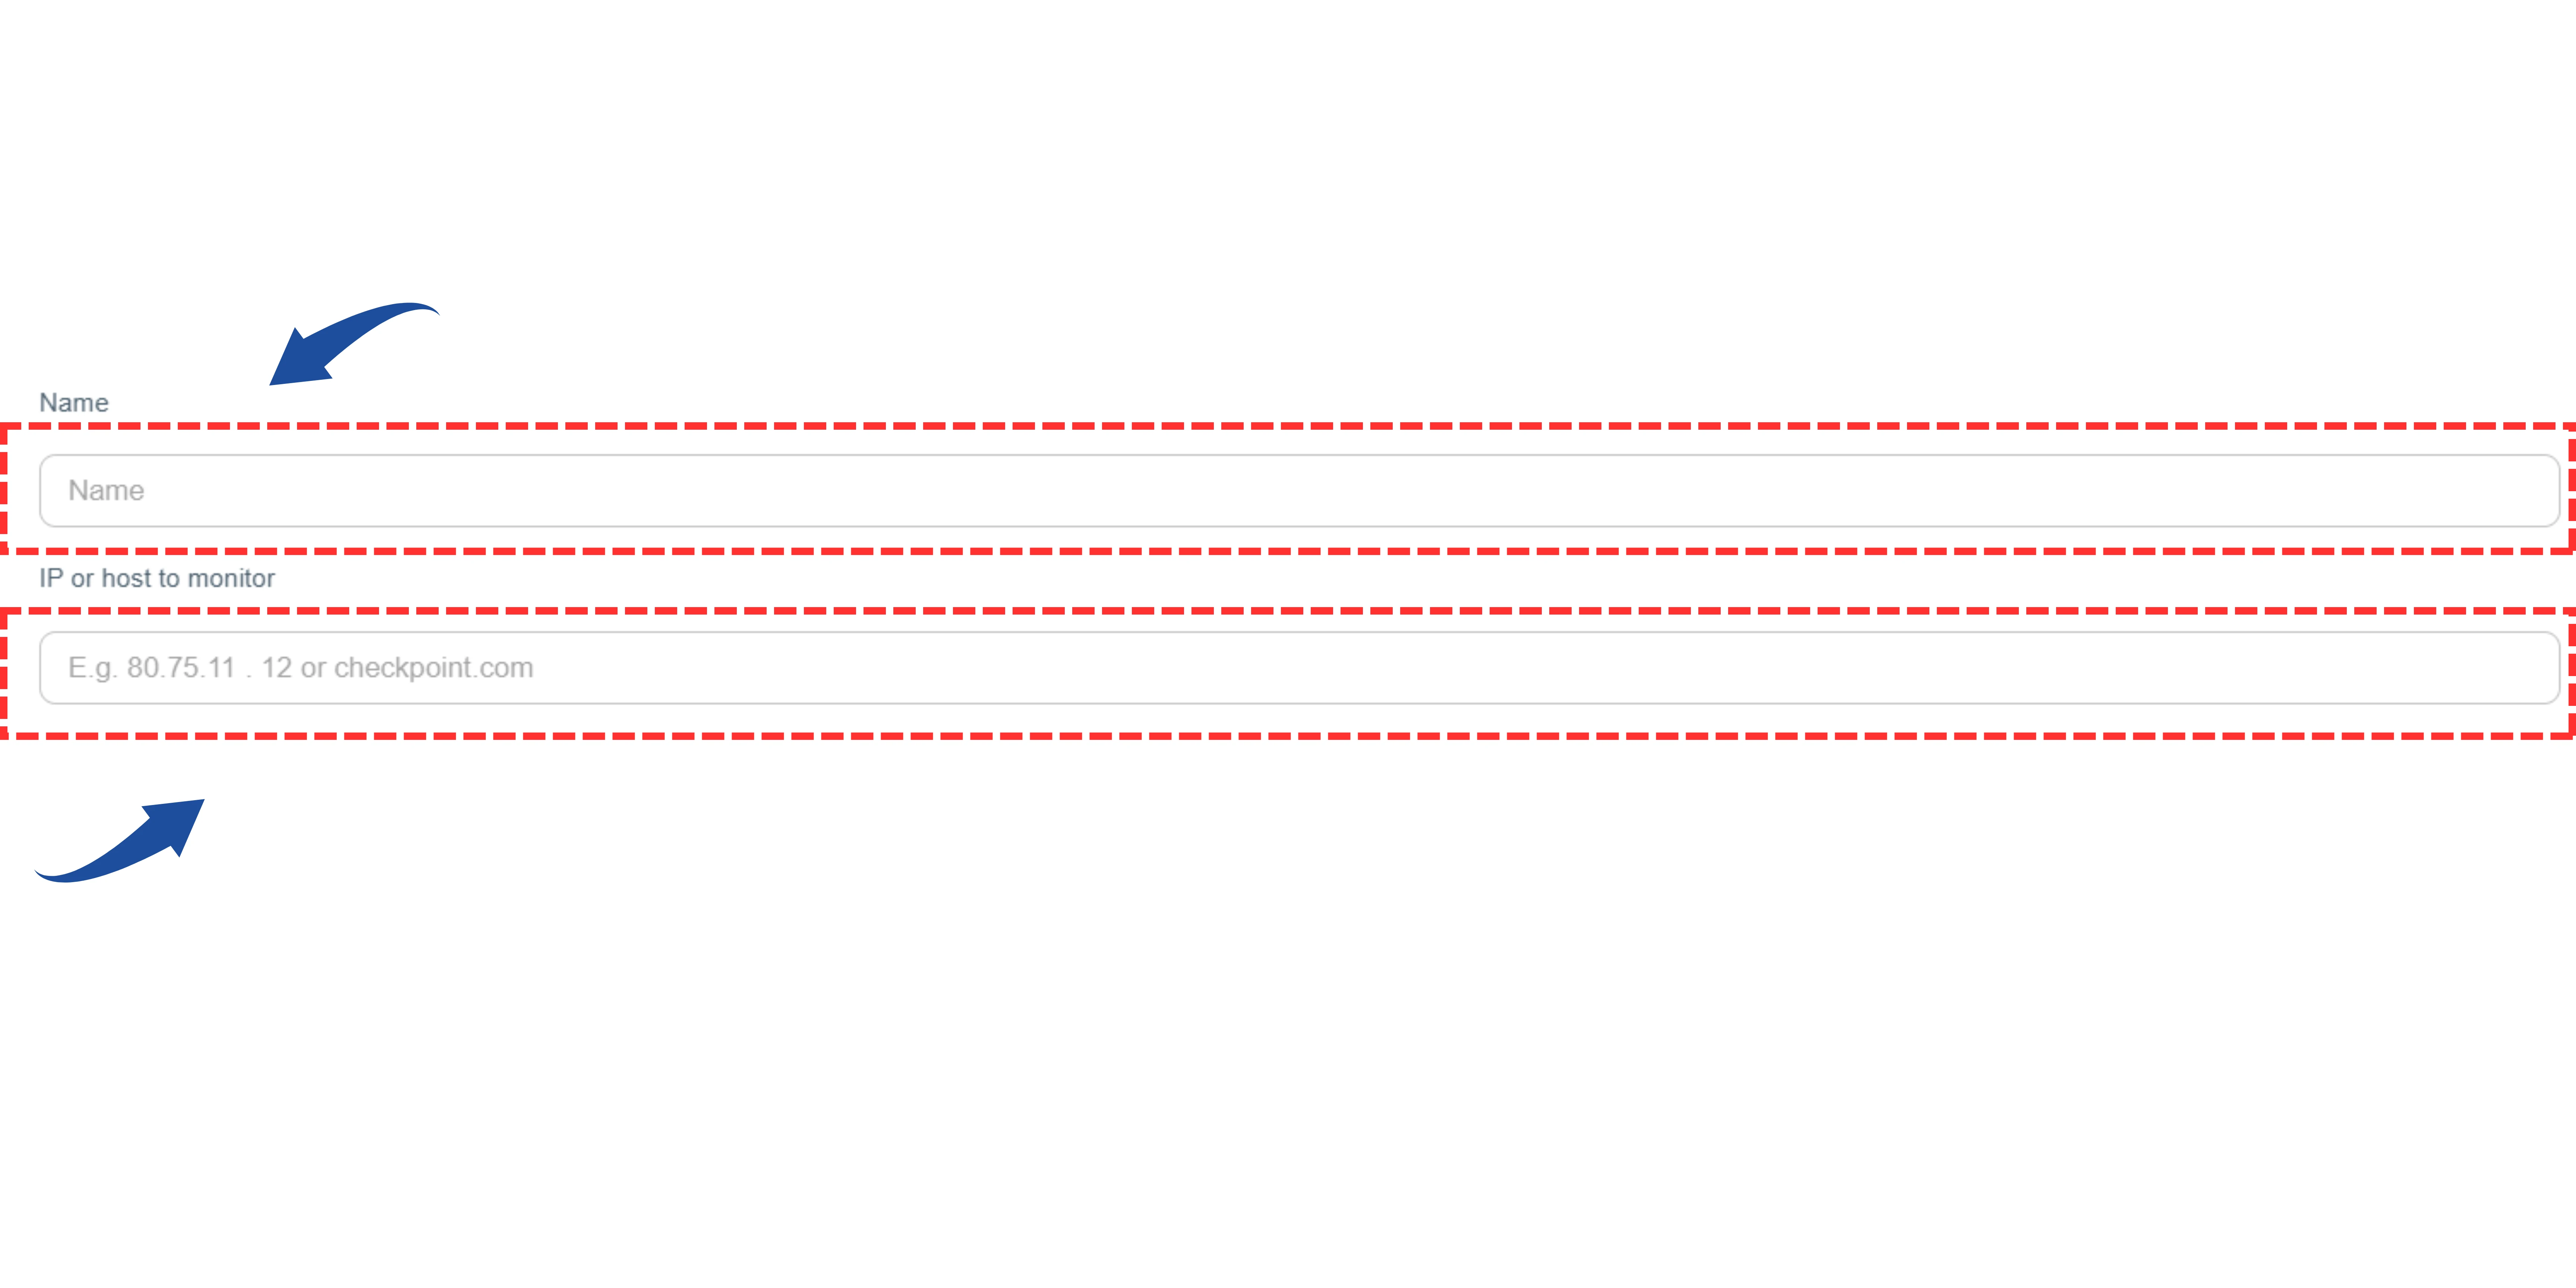
- Name: Give your monitor a recognizable name (e.g., "Main Server").
- IP or host to monitor: Enter the IP address or hostname you want to ping (e.g., 192.168.1.1 or example.com).
4 Configure Monitoring Settings
Configure how and when you want to be notified.
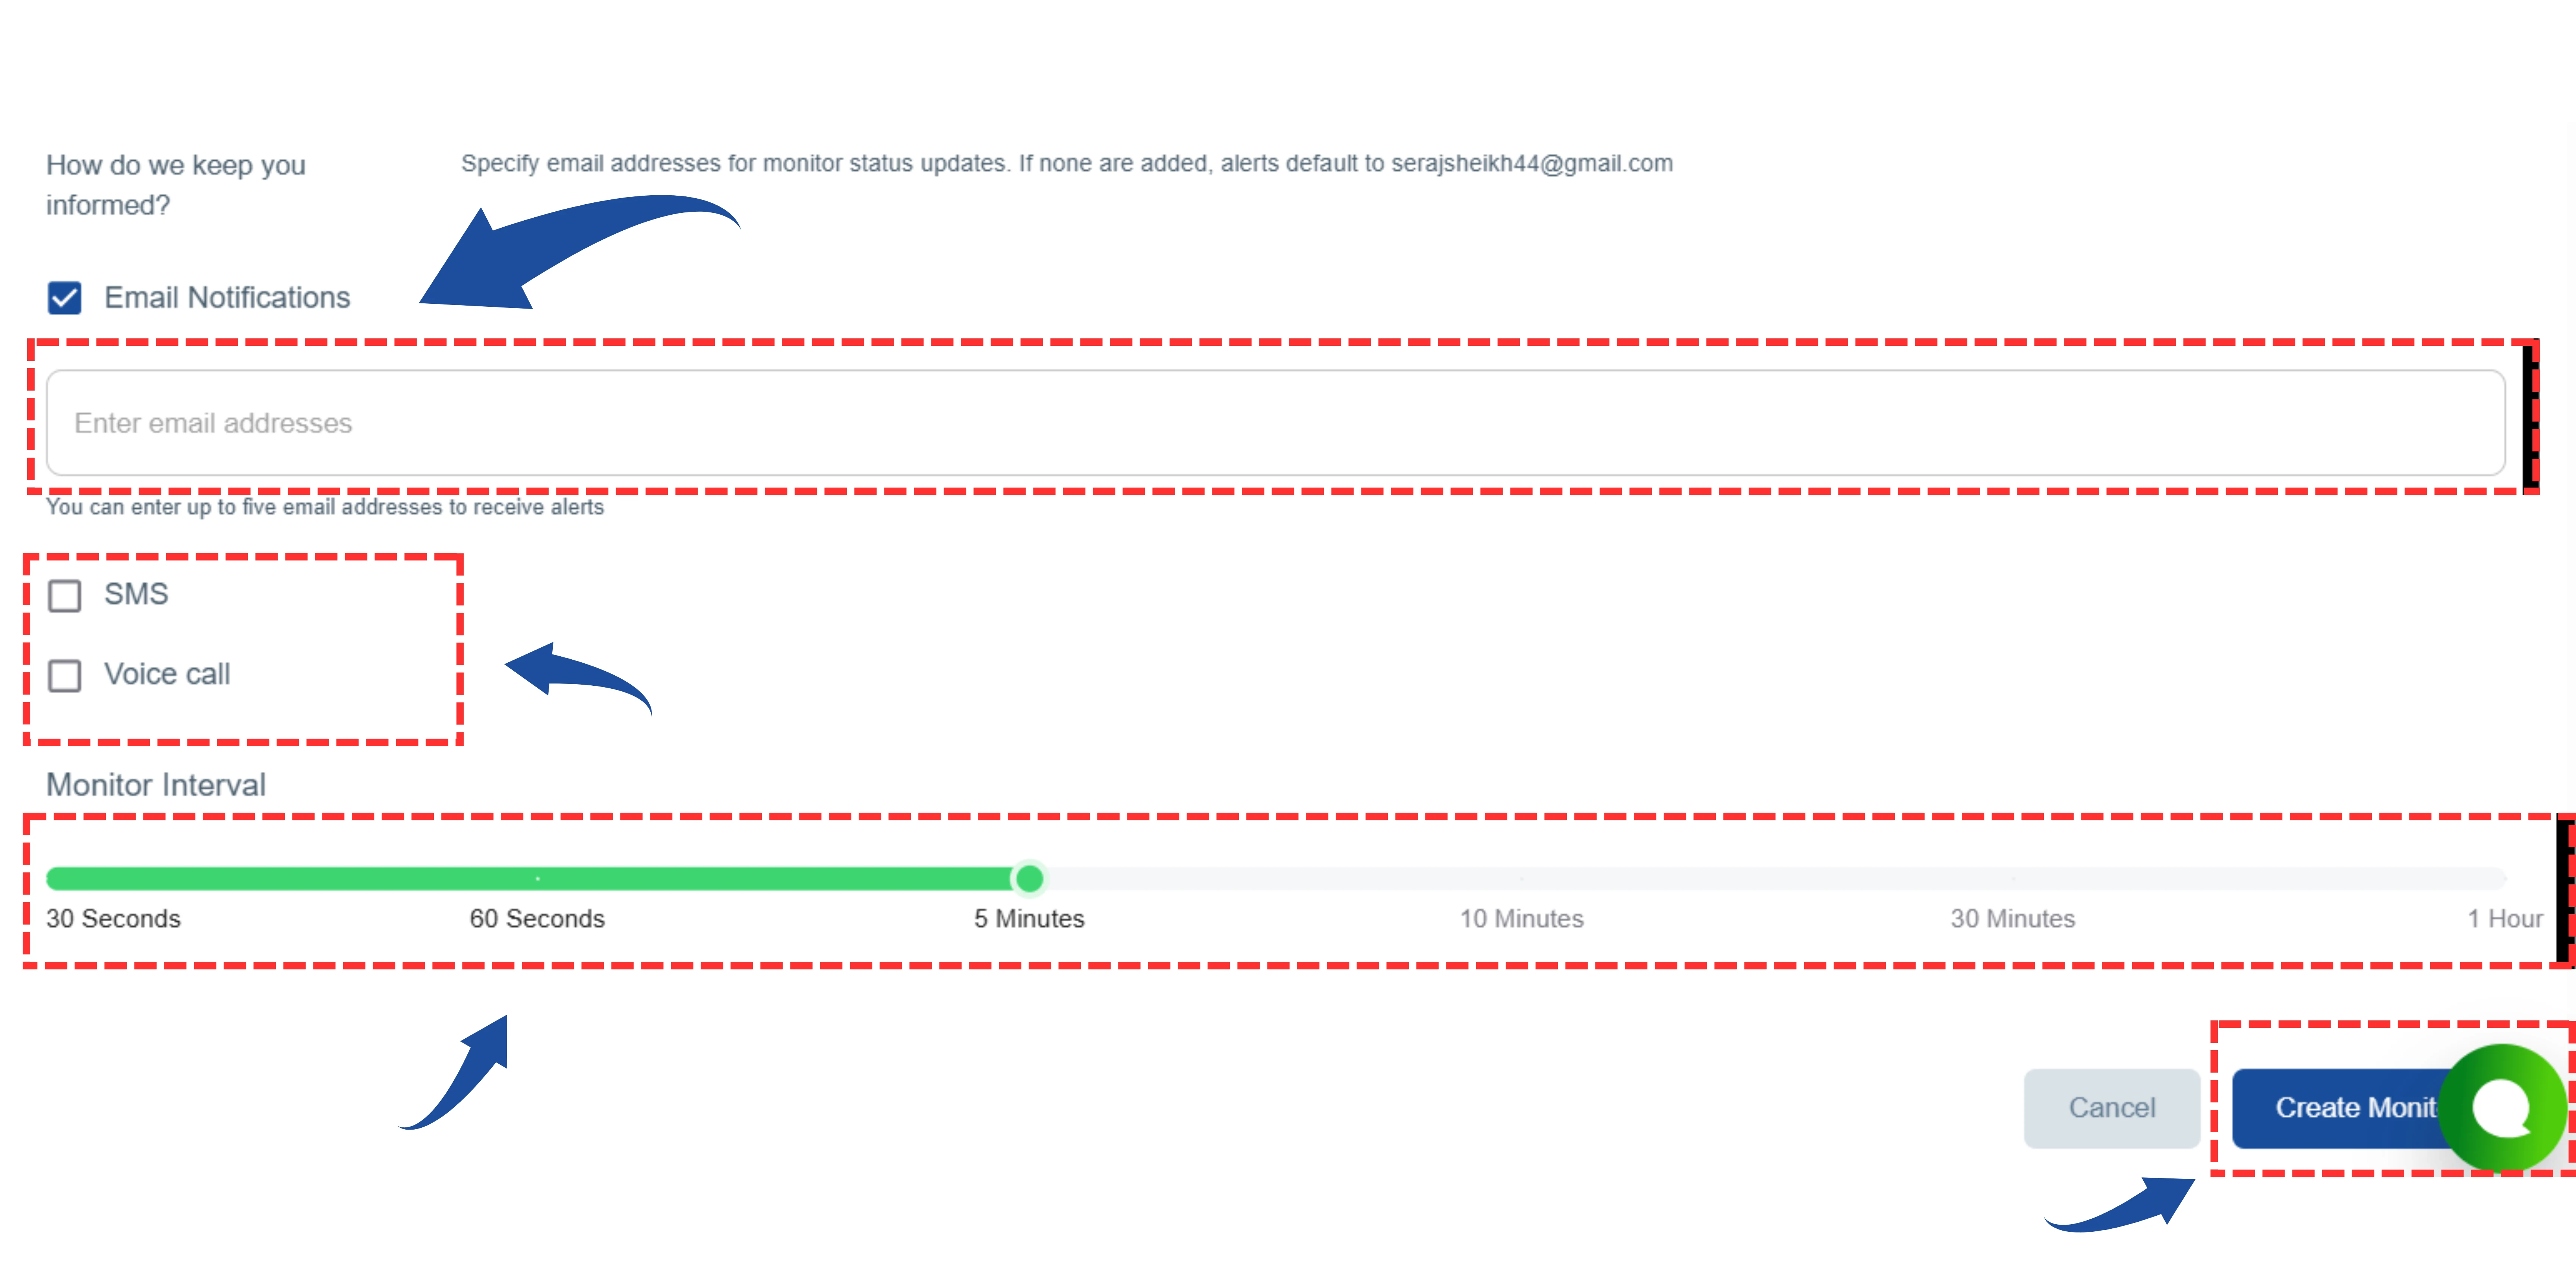
- Email Notifications: Enter the email addresses where you want to receive alerts.
If no email is added, alerts will be sent to the default email address (xyz@gmail.com). - Alert Types: Choose how you wish to be notified when a problem is detected. You can select both:
- ✅ SMS (Text Message)
- ✅ Voice Call (Phone Call)
- Monitor Interval: Choose how frequently the system should check your target. Available options are:
- 30 Seconds
- 60 Seconds
- 5 Minutes
- 10 Minutes
- 50 Minutes
- 1 Hour
5 Add tag and Create the Monitor
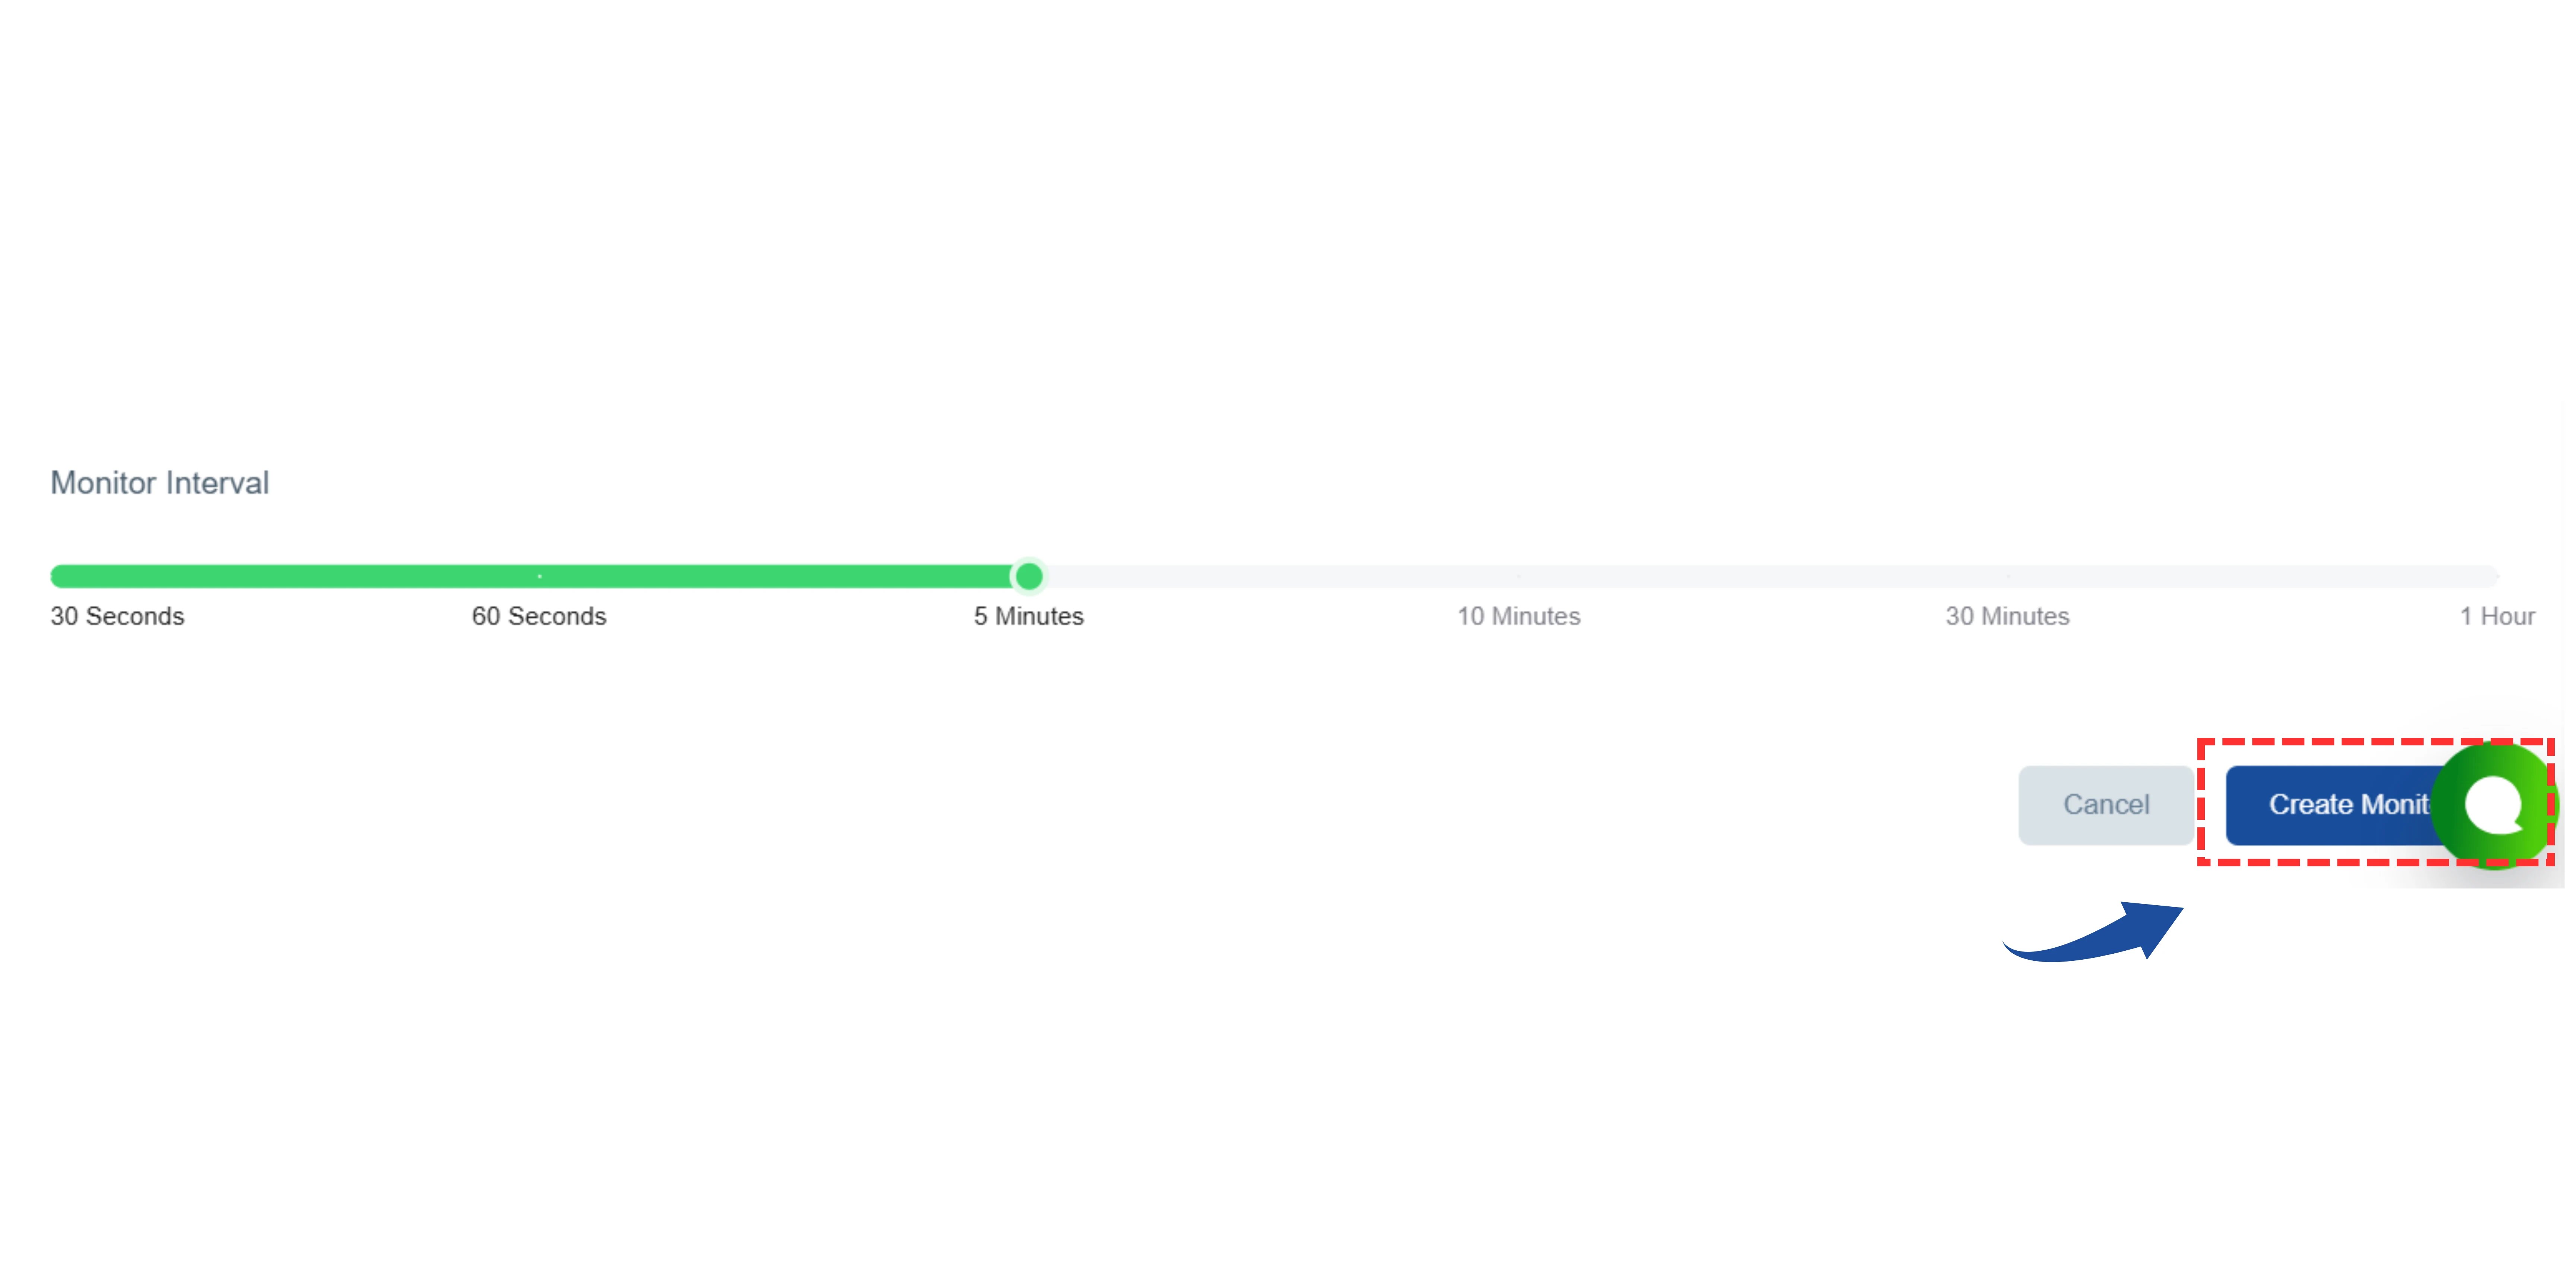
- Tags (Optional): By adding tags, you can group your monitors. This helps in managing them easily later or organizing them on the status page.
- Finally, click the "Create Monitor" button.